NVM also knows as a “Node Version Manager” used for installing multiple version of Node.js in your system. NVM allows you to easily switch between different Node.js versions. In my previous article, you learned how to install Node.js and NPM on Windows 10.
Now, I will explain how to install and use NVM for Windows on Windows 10.
Prerequisites
- A system running Windows 10 or Windows server with Node.js installed.
- An administrator password is configured on your server.
Install NVM for Windows
In order to download NVM for Windows installer, go to the NVM GitHub page as shown below:
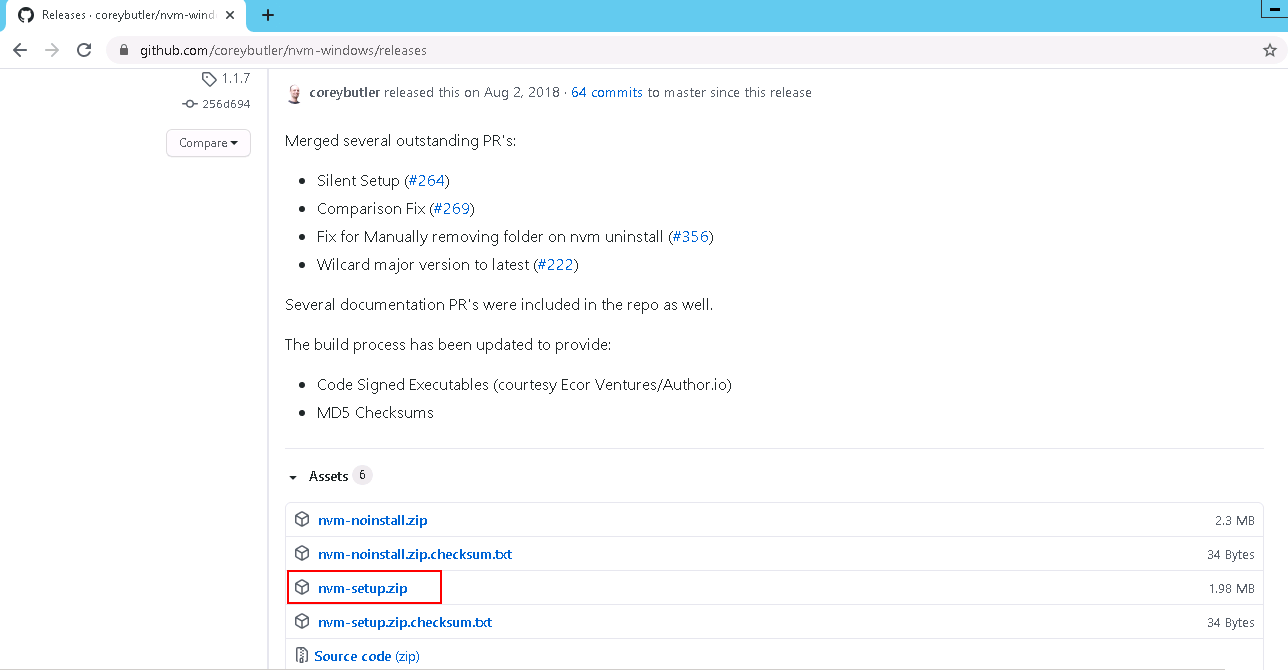
Now, click on the nvm-setup.zip to download the setup file in your Windows system. Once the download is completed, follow the below steps to install NVM for Windows:
Step 1 – Extract the downloaded zip file and double-click on the installer to start the installation. You should see the following screen:
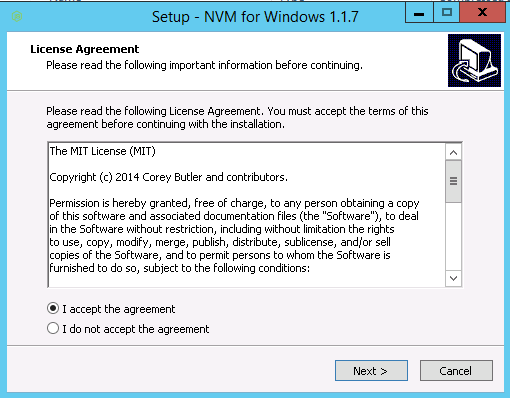
Step 2 – Accept the License agreement and click on the Next button. You will be asked to provide Node.js installation path as shown below:
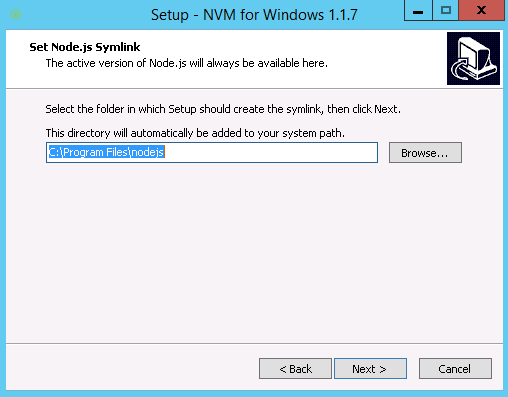
Step 3 – Specify the installation path and click on the Next button. You should see the following screen:
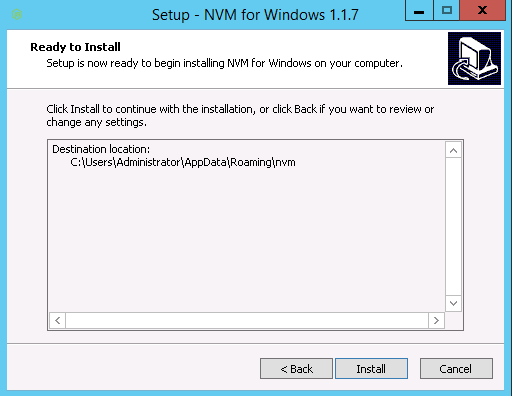
Step 4 – Now, click on the Install button to start the installation. Once the installation is completed, you should see the following screen:
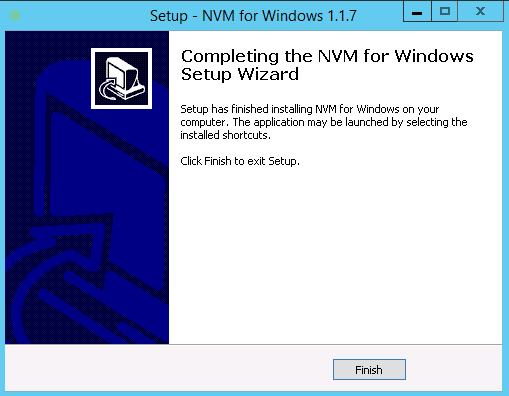
Step 5 – Now, click on the Finish button to finish the installation. Now, restart your system to apply the system-wise path.
Verify the NVM Version
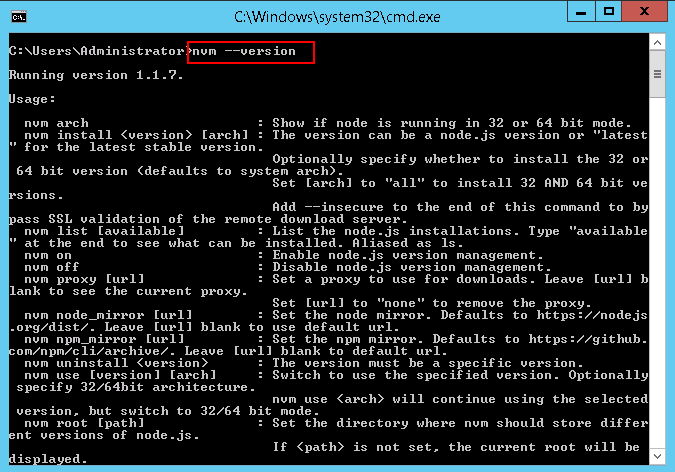
At this point, NVM is installed in your system. Now, search for Windows command prompt (cmd) => Right-click and click on run as an administrator user. This will open the Windows command prompt. Now, run the following command to verify the NVM version:
nvm --version
You should see the installed version NVM in the following screen:
Next, you will need to enable the NVM to manage the Node.js. You can enable it with the following command:
nvm on
Manage Node.js with NVM
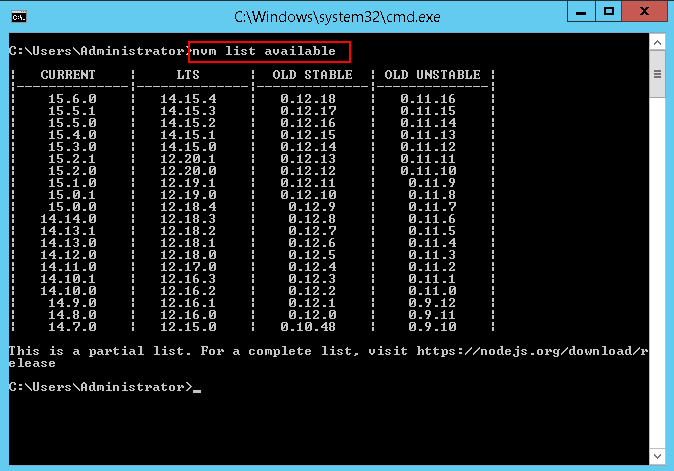
You can list all available version of Node.js with the following command:
nvm list available
You should see all Node.js versions in the following screen:
To install the latest version of Node.js, run the following command:
nvm install latest
To install the specific version of Node.js, run the following command:
nvm install 14.15.4
If you want to switch to the specific Node.js version, run the following command:
nvm use 14.15.4
You can now verify your current Node.js version with the following command:
node --version
Conclusion
In the above guide, you learned how to install NVM for Windows and manage Node.js version with NVM. I hope this will helps you to manage the different Node.js versions.