
We have tied up with a Kamatera cloud provider that provides a free Linux and Windows server on the Cloud for 30 days.
You will require the following things to get a free server machine on the Kamatera Cloud:
- A valid Credit Card to activate the free account. When the free period expires, you can stop the billing by deleting, stopping, or terminating the server instance.
Create and Activate a Free Account
Follow the below steps to get a free server for 30 days:
Step 1 – Click here to visit the Kamatera Cloud official website sign-up page:
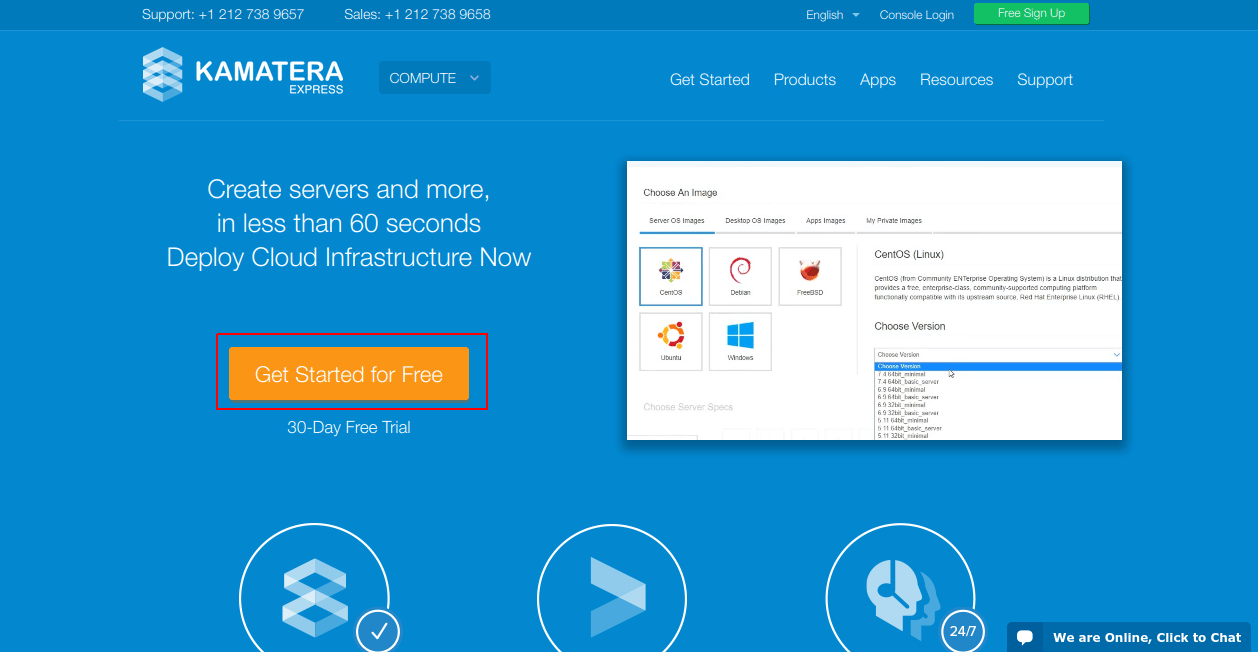
Step 2 – Click on the “Get Started for Free”. You’ll be prompted with a popup where you’ll have to enter your credentials.

Step 3 – Provide your valid email address and set a password, then click on the GO button.
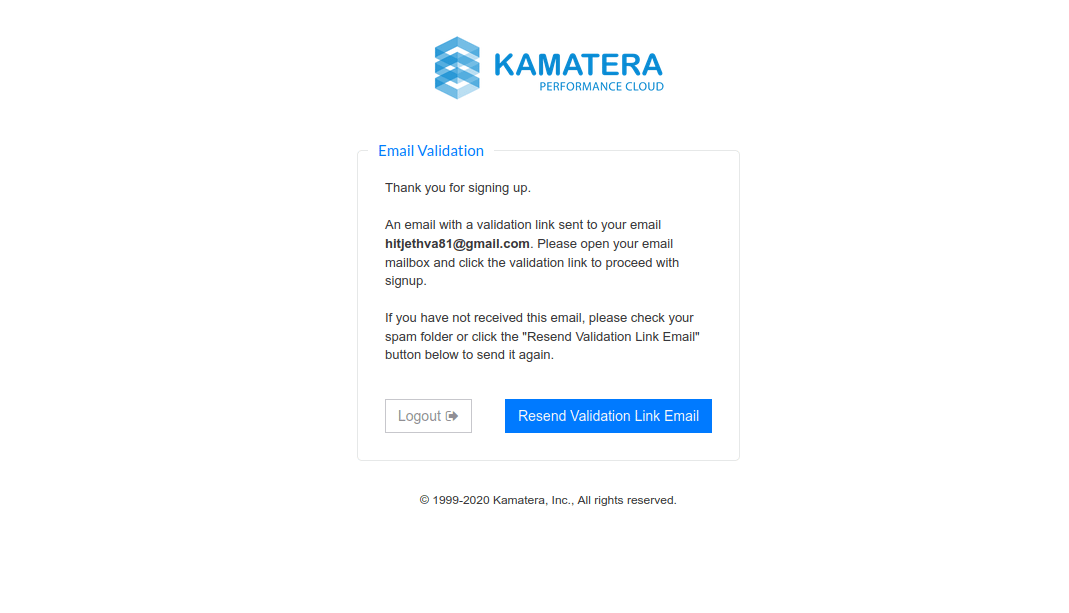
Step 4 – You will receive an email from Kamatera with a validation link.
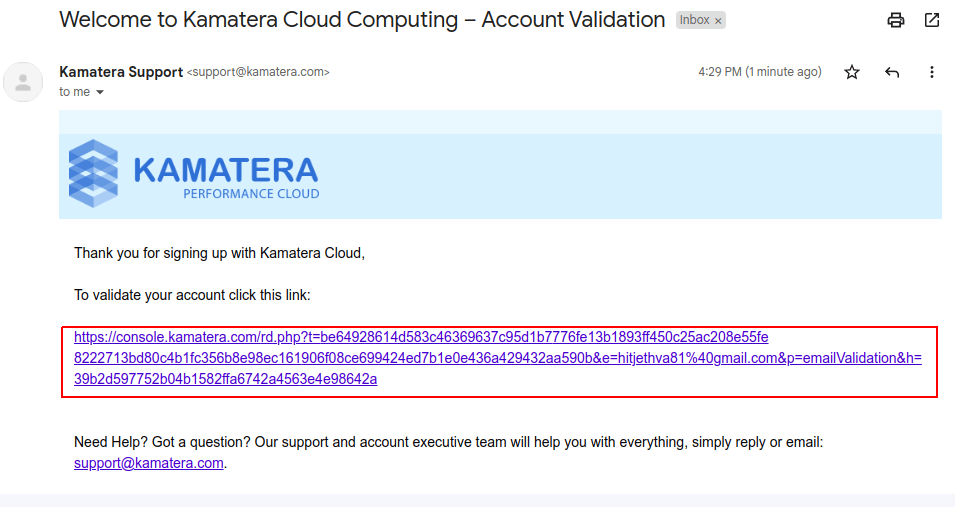
Step 5 – Click on the link in your email to validate your account. You should see the Kamatera login page:
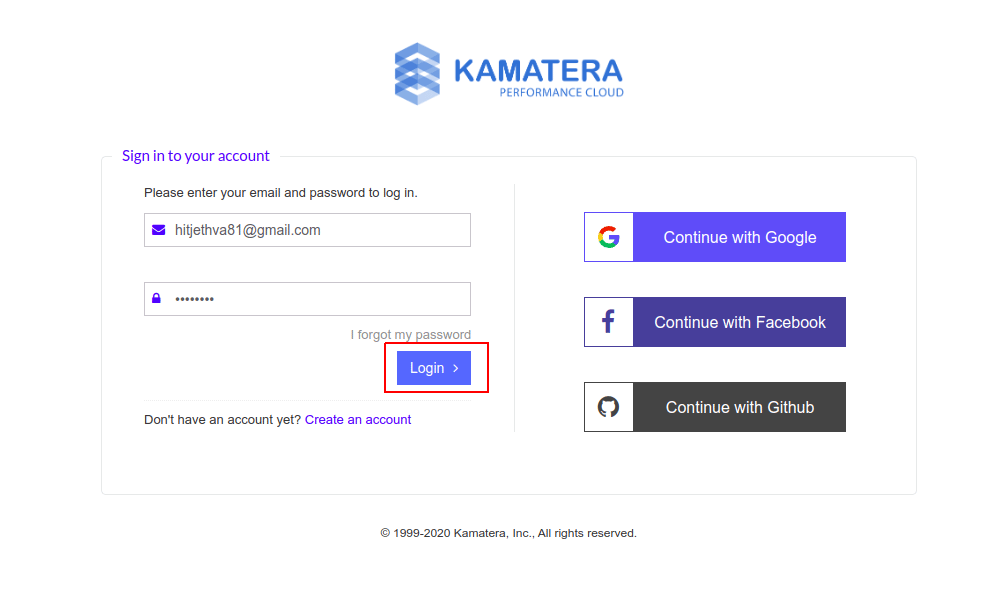
Step 6 – Provide your email address, password and click on the Login button. You will receive another email from Kamatera with an access code for two-factor authentication:

Step 7 – Provide your access code and click on the Login button. Once you are logged in. You should see the Kamatera dashboard:
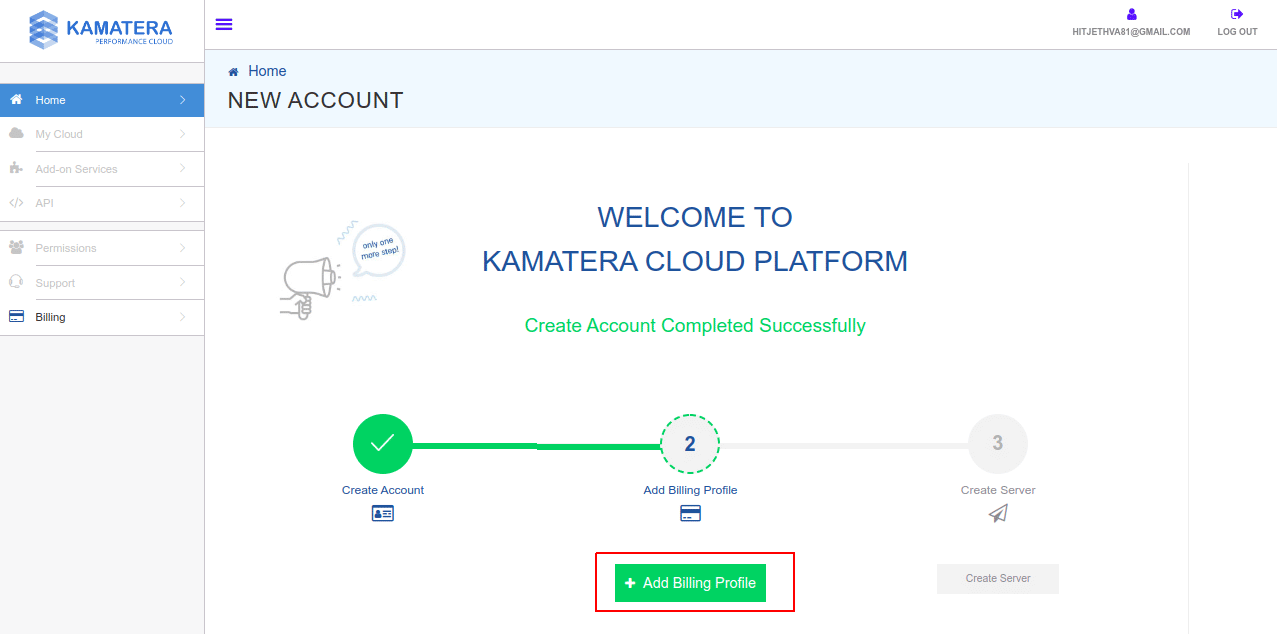
Step 8 – Click on the Add Billing Profile. You should see the Billing profile page:
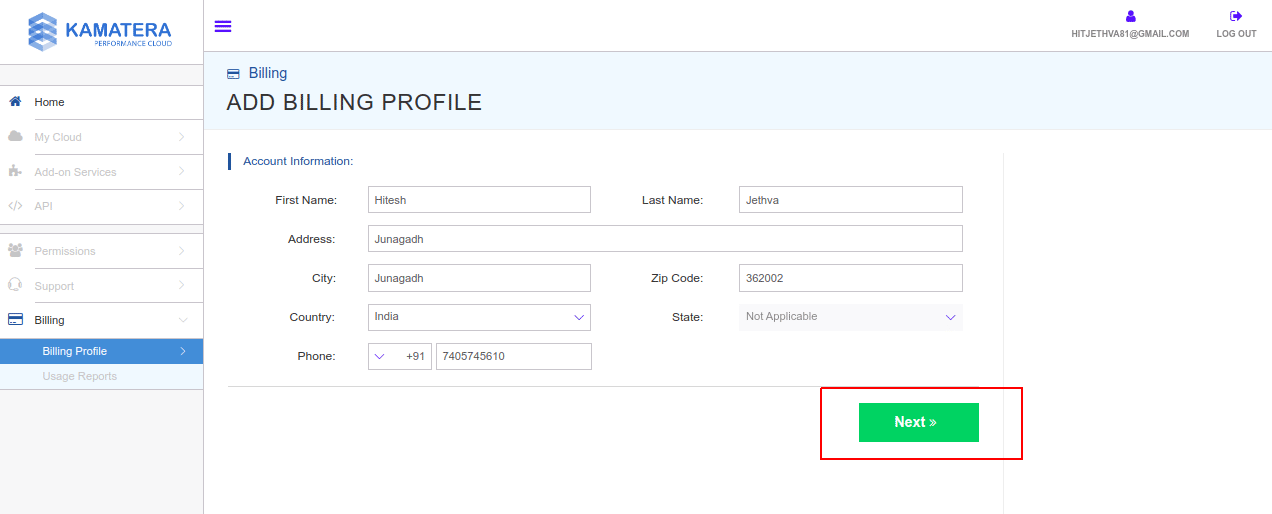
Step 9 – Provide your basic information and click on the Next button. You should see the Phone verification page:
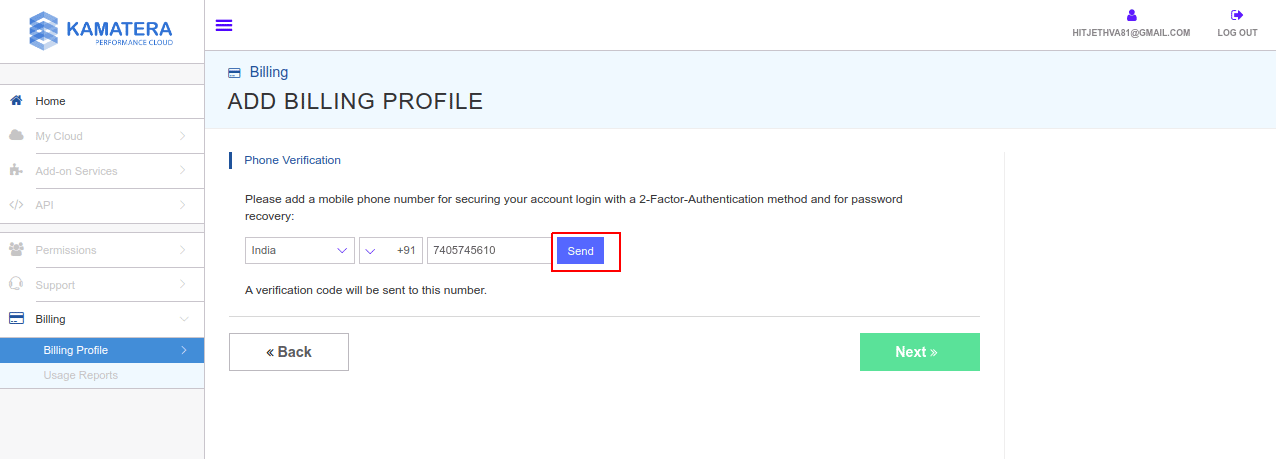
Step 10 – Provide your Phone number and click on the Send button. You will receive a 6-digit code on your phone.
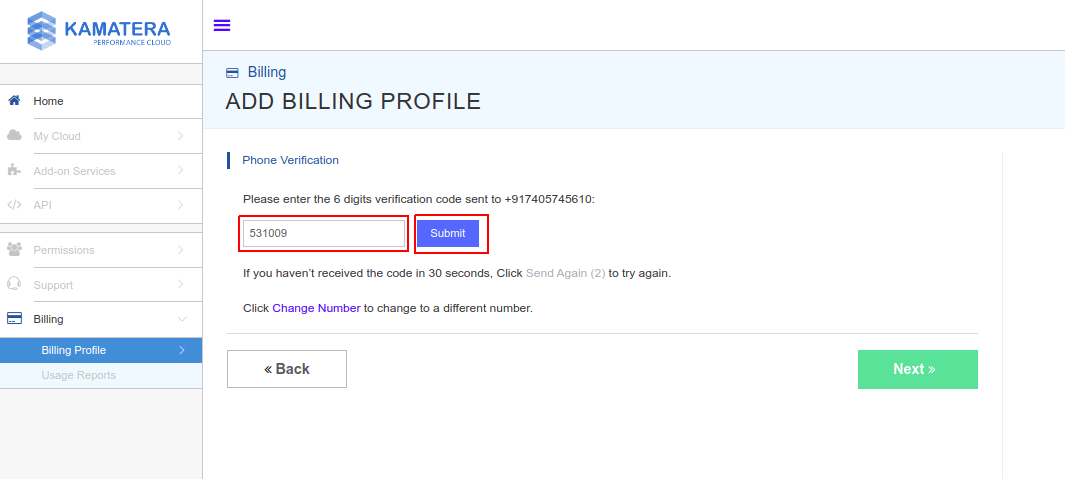
Step 11 – Provide 6-digit code in the box and click on the Submit button. Once the Phone number is verified. You should see the following page:
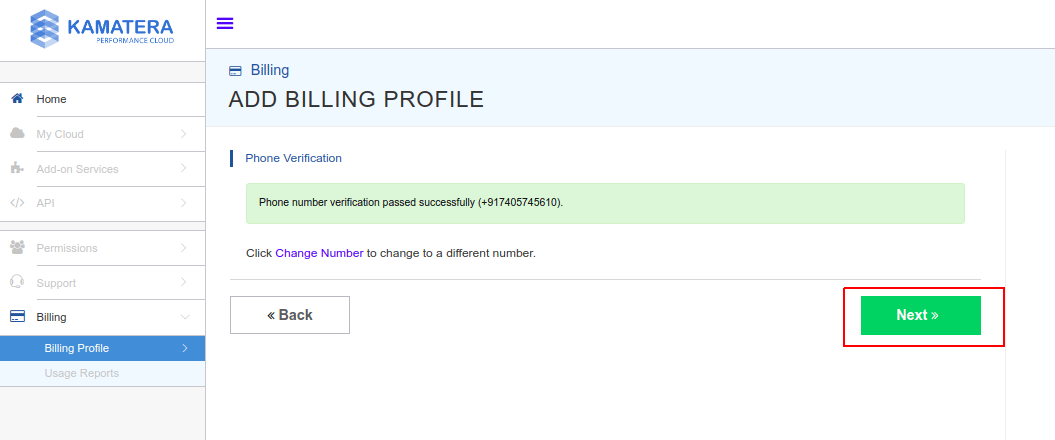
Step 12 – Click on the Next button. You should see the Credit Card information page:
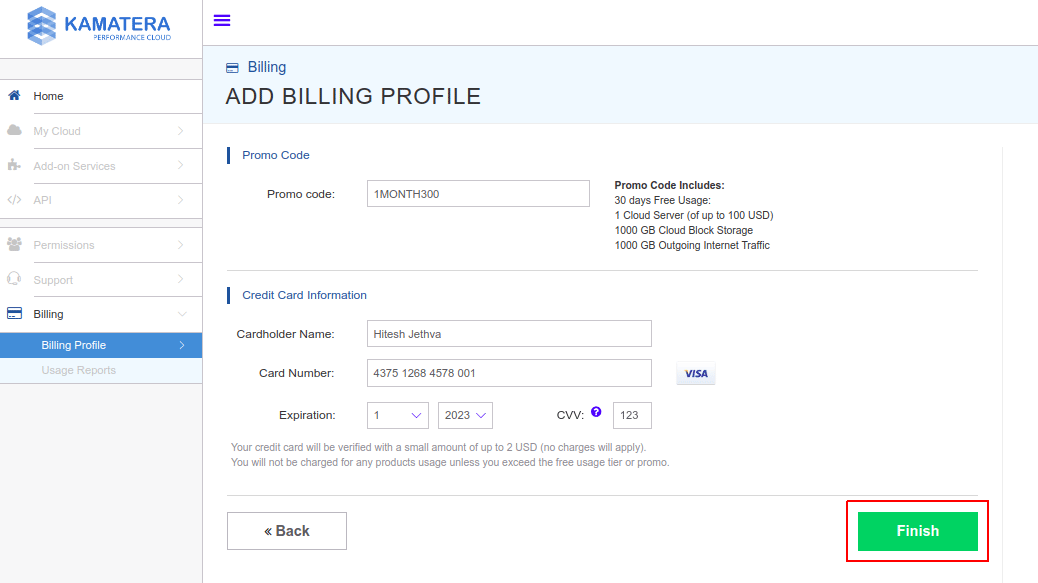
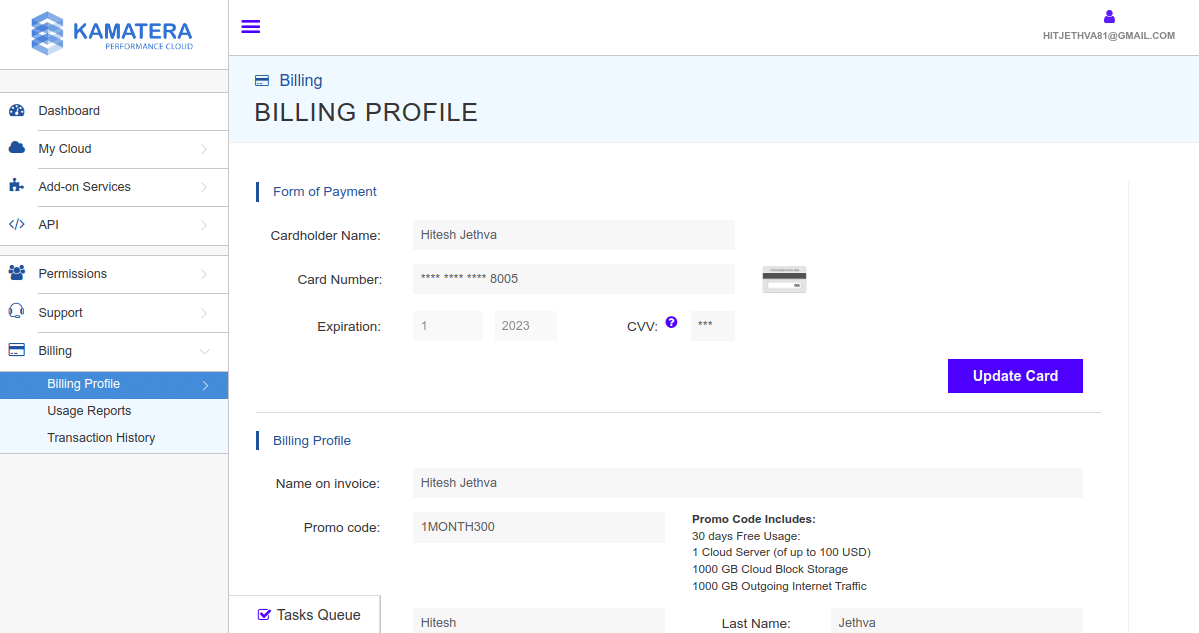
Step 13 – Provide your Credit Card information and click on the Finish button. You should see the following page:
Note: You are signing up for the free trial offer, so Kamatera will not bill you for the products and services for the first 30 days. During the signup process, your billing details are required to make sure you’re not a spammer. It helps prevent users from signing up with multiple phone numbers and email accounts to repeatedly get the free trial offer.
Step 14 – Click on the My Cloud => Servers. You should see the following page:
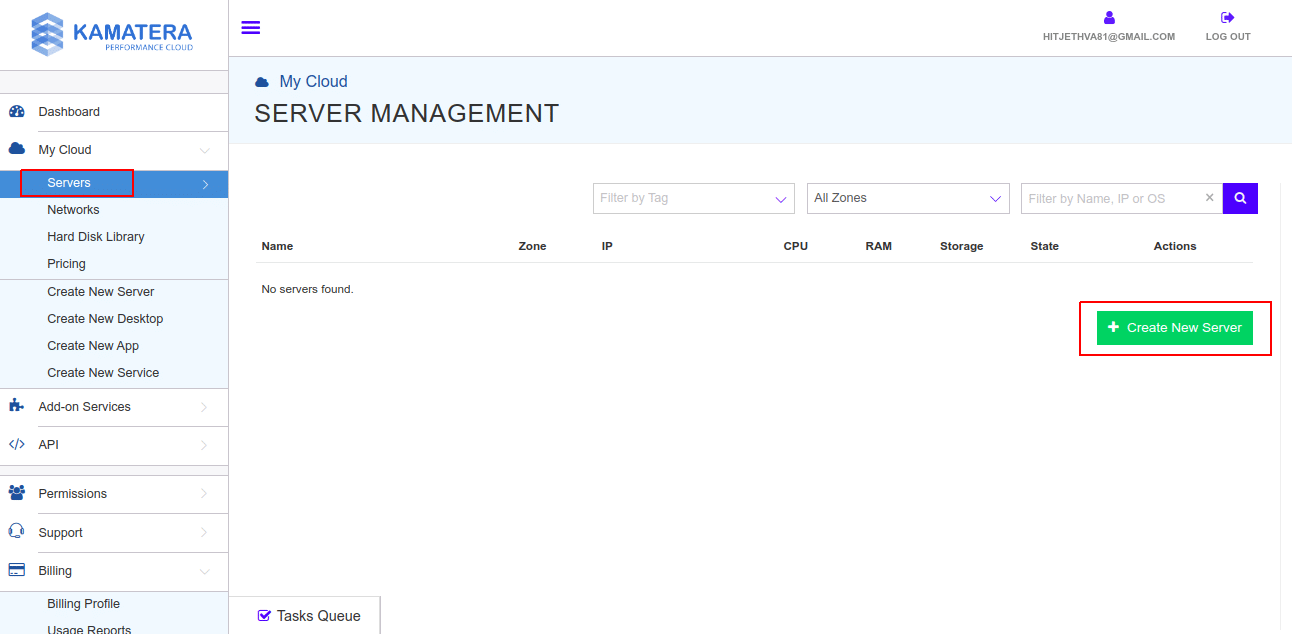
Step 15 – Click on the Create New Server button to create your first server. You should see the following page.
Choose Zone
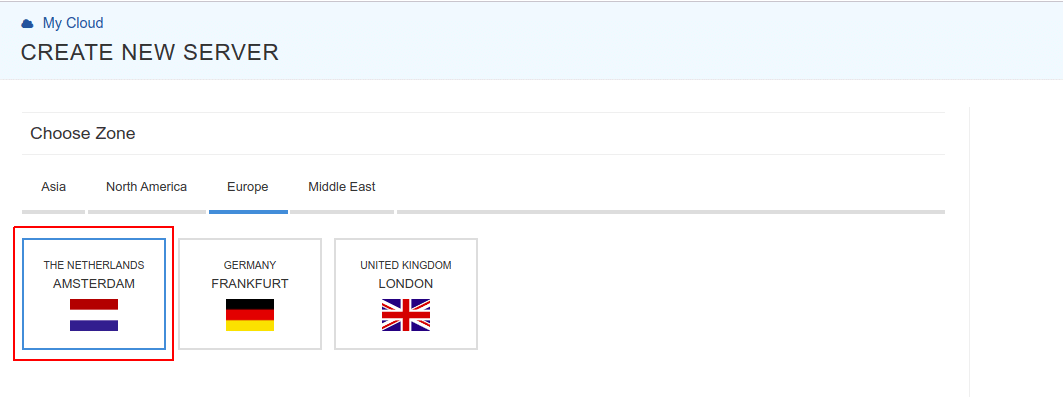
Select your nearest zone in the zone selection.
Choose an Image
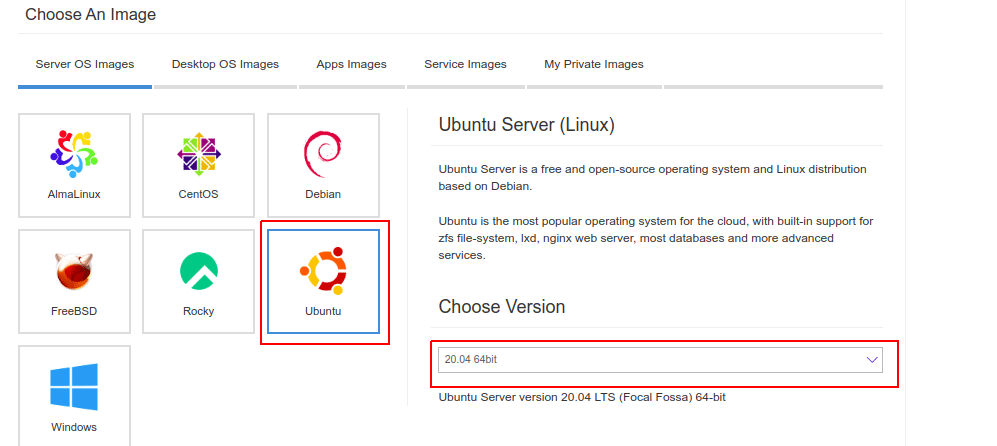
Select Ubuntu image and version in the Version selection.
Choose Server Specs
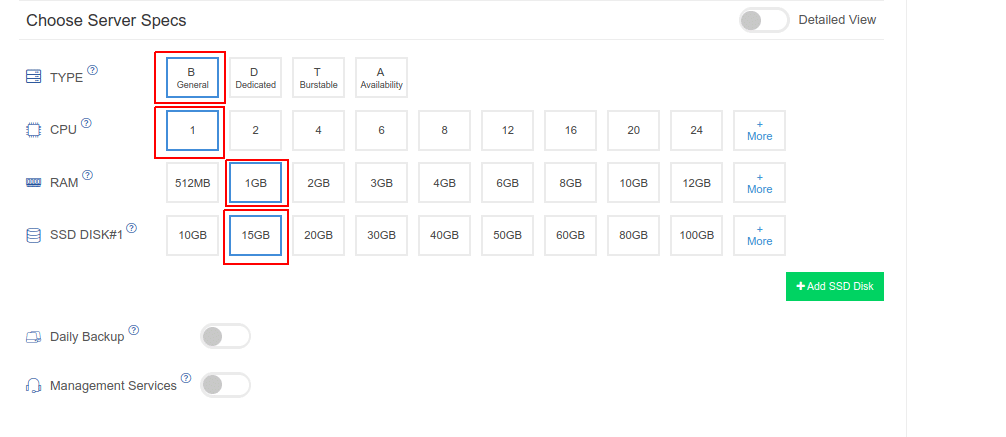
Select server type: B General
CPU: 1
RAM: 1 GB
SSD Disk: 15 GB
Choose Networking
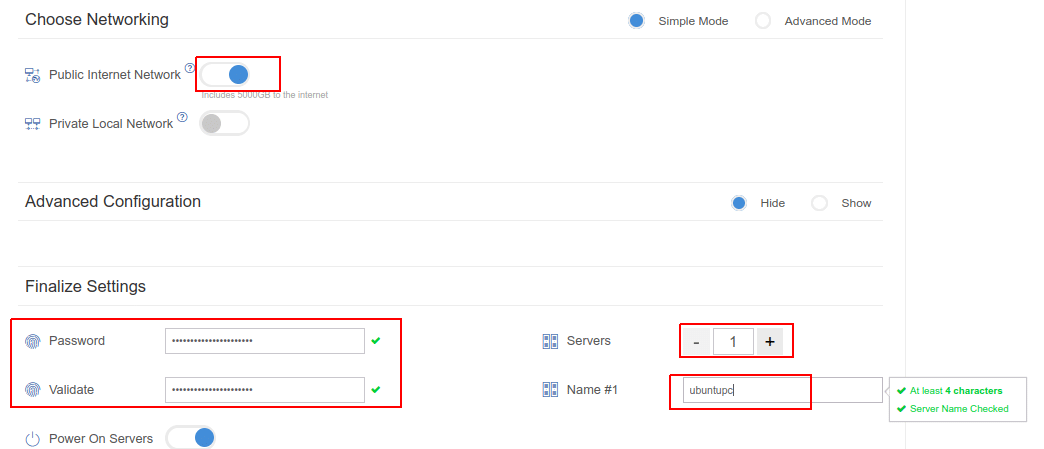
Enable public internet network
Define your root password (Note down your root password in a safe place. You will need it to connect to the server)
Define Ubuntu hostname
Enable power on servers
Billig Cycle & Pricing
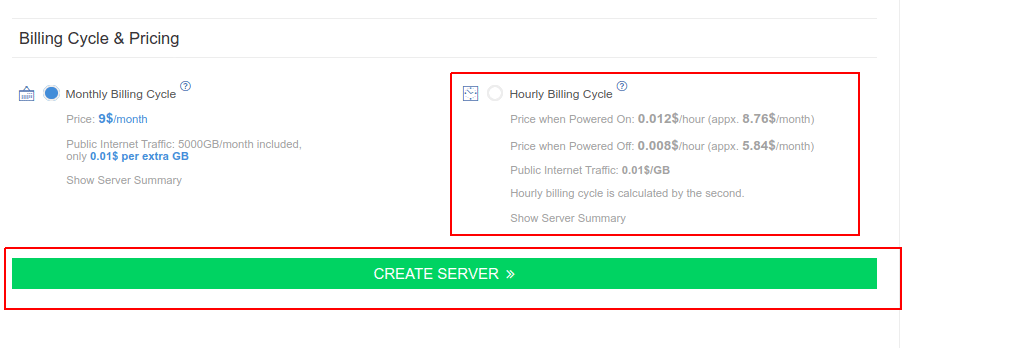
Select Hourly Billing Cycle
After providing all the necessary information, click on the CREATE SERVER button. Wait for some time to create a server. Once the Ubuntu server is created. You should see your running Ubuntu server on the following screen:
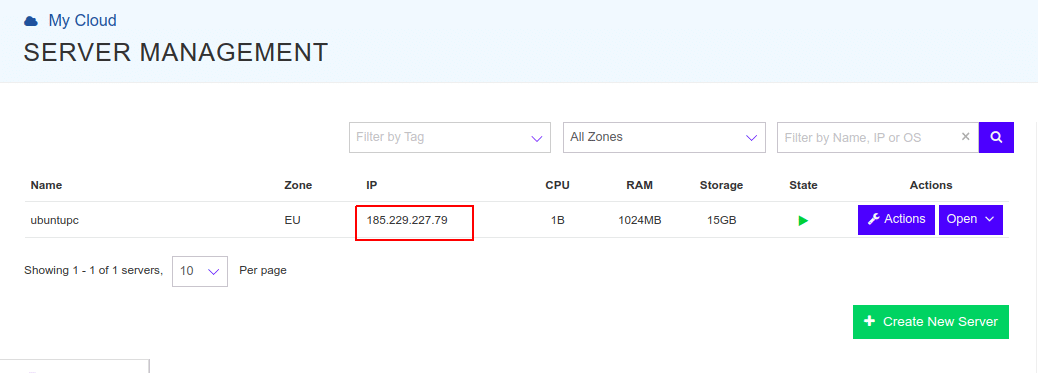
As you can see, 185.229.227.79 is the Public IP address of your server. You can use this IP address to connect to your server via SSH or Putty.
Connect Ubuntu Cloud Server from Windows Machine
At this point, your Ubuntu server is created and started on the Kamatera cloud. You can now connect it via SSH or Putty.
If you are using Windows operating system on your laptop or local system, then you will need to use Putty software to connect your Ubuntu server.
1. First, click here to download the Putty software.
2. After downloading Putty, double click on it to install it on your Windows machine.
3. After the installation, launch the Pytty software. You should see the following screen:
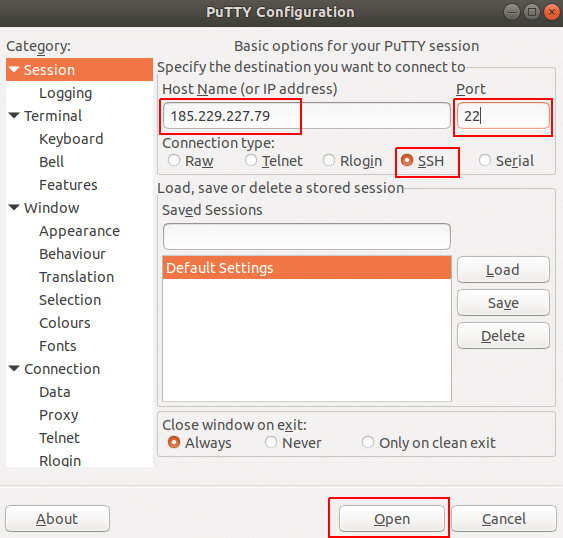
Provide the following details:
- Hostname or IP Address – Provide your Ubuntu server public IP address
- Port – Provide default SSH port
- SSH – Select SSH protocol
4. After providing all details, click on the Open button. You should see the following screen:
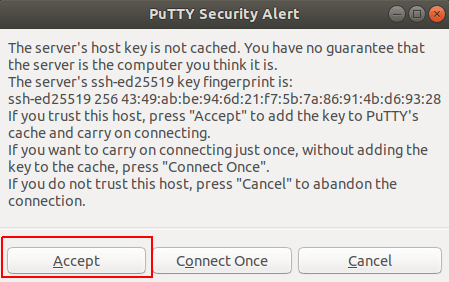
5. Click on the Accept button to verify your host. You should see the following screen:
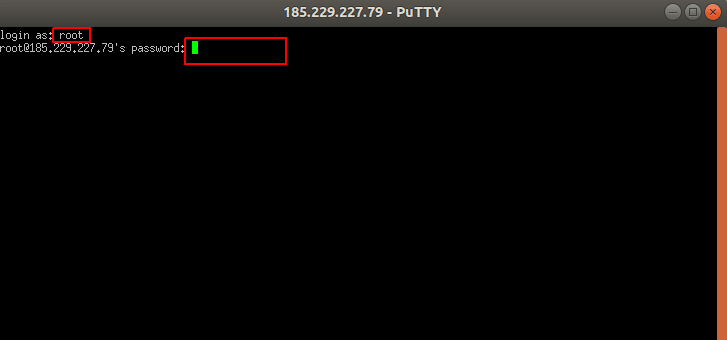
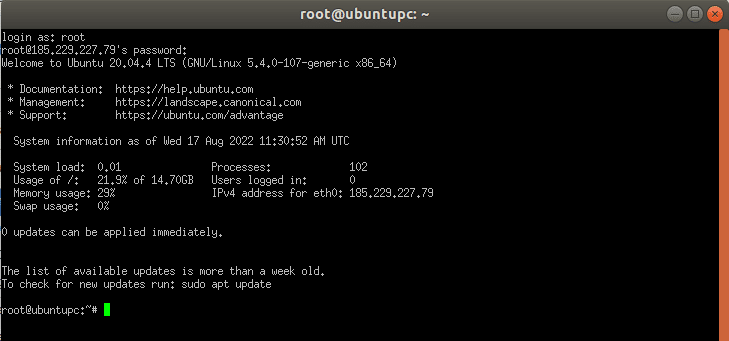
6. Provide root as a username, and your root password, then press the Enter key. Once you are connected to the Ubuntu server, you should see the Ubuntu server console on the following screen:
How to Connect Ubuntu Cloud Server from Linux/Mac Machine
If you are using any Linux or Mac operating system on your laptop or local system, then you can use the SSH tool to connect your Ubuntu cloud server.
Open the command line terminal interface from your Linux/Mac desktop and run the following command:
ssh root@public-ip-of-ubuntu-server
You will be asked to provide your root password to connect to the Ubuntu cloud server.
Note: After the free trial period is expired. Shut down and delete your Ubuntu server from the Kamatera cloud dashboard to stop the billing.