Java is a free, open-source and one of the most widely used Object Oriented Programming language developed by Sun Microsystems. It is very popular for its robust features including, Secure, Distributed, Multithreaded, Portable and Platform independent. There are two major implementations of Java OpenJDK and Oracle Java. The OpenJDK is a free version of Java while the Oracle Java has a few additional commercial features. You can use Oracle Java for non-commercial use like personal use and development use.
In this tutorial, we will learn the following:
- How to Install Java 11 on Debian 10.
- How to Install Java 8 on Debian 10.
- How to Install Oracle Java 11 on Debian 10.
Prerequisites
- A server running Debian 10.
- A root password is set up in your server.
Install Java 11 on Debian 10
At the time of writing this tutorial, the OpenJDK 11 is the long term support (LTS) version of Java. By default, it is available in the Debian 10 default repository. You can install it by just running the following command:
apt-get update -y
apt-get install default-jdk -y
Once the installation has been completed successfully, you can verify the Java version using the following command:
java -version
You should get the following output:
openjdk version "11.0.8" 2020-07-14
OpenJDK Runtime Environment (build 11.0.8+10-post-Debian-1deb10u1)
OpenJDK 64-Bit Server VM (build 11.0.8+10-post-Debian-1deb10u1, mixed mode, sharing)
If you want to install only Java Runtime Environment (JRE), run the following command:
apt-get install default-jre -y
Install Java 8 On Debian 10
By default, Java 8 is not included in the Debian 10 default repository. You will need to add the Java repository in your system.
First, install the required dependencies using the following command:
apt-get install apt-transport-https ca-certificates wget dirmngr gnupg software-properties-common -y
Next, download and add the GPG key with the following command:
wget -qO - https://adoptopenjdk.jfrog.io/adoptopenjdk/api/gpg/key/public | apt-key add -
Next, add the Java 8 repository using the following command:
add-apt-repository --yes https://adoptopenjdk.jfrog.io/adoptopenjdk/deb/
Once the repository is added, update the repository and install the Java 8 with the following command:
apt-get update -y
apt-get install adoptopenjdk-8-hotspot -y
Once the installation has been completed successfully, you can verify the Java version using the following command:
java -version
You should get the following output:
openjdk version "1.8.0_265"
OpenJDK Runtime Environment (AdoptOpenJDK)(build 1.8.0_265-b01)
OpenJDK 64-Bit Server VM (AdoptOpenJDK)(build 25.265-b01, mixed mode)
Install Oracle Java SE 11 on Debian 10
Oracle Java is a commercial version Java with some additional features. You can use it only for personal or development use. By default, the Oracle Java is not included in the Debian 10 repository. So you will need to create an Oracle account and download your desired version of Java from the Oracle website.
First, Log in and visit the Oracle Downloads page and locate your desired version of Java. In this case, we will install Java SE 11 LTS as shown below:
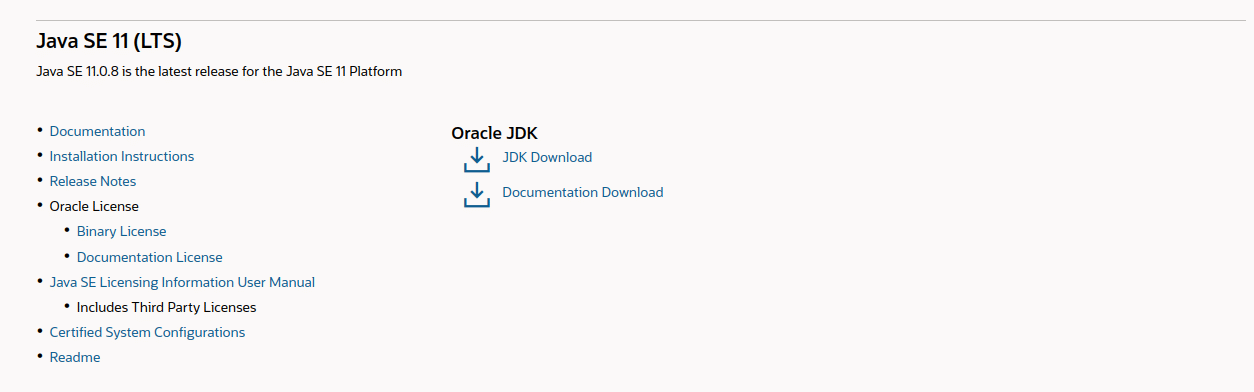
Next, click on the JDK Download button. You should see the page that shows the available versions:
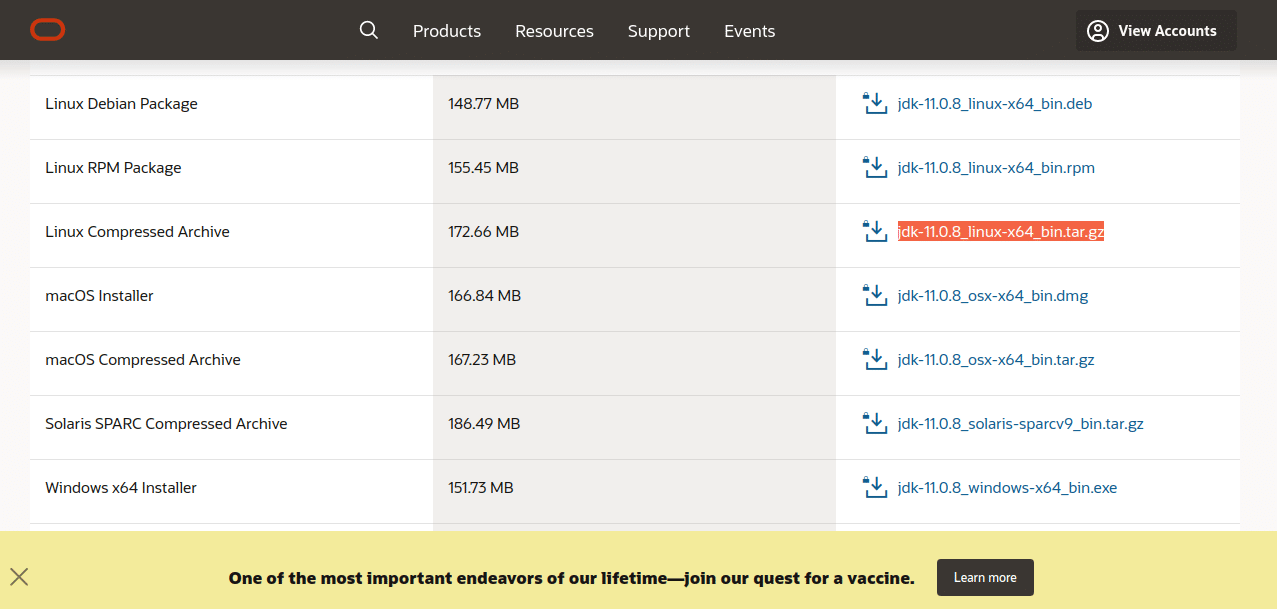
Select the jdk-11.0.8_linux-x64_bin.tar.gz package for Linux and download it on your system.
Next, create a directory for Java installation:
mkdir -p /var/cache/oracle-jdk11-installer-local
Next, copy the downloaded file to that directory:
cp jdk-11.0.8_linux-x64_bin.tar.gz /var/cache/oracle-jdk11-installer-local/
Next, install the required dependencies in your system with the following command:
apt-get install software-properties-common gnupg2 -y
Next, import and sign the key with the following command:
apt-key adv --keyserver keyserver.ubuntu.com --recv-keys EA8CACC073C3DB2A
You should get the following output:
Executing: /tmp/apt-key-gpghome.jK1m3NXGgW/gpg.1.sh --keyserver keyserver.ubuntu.com --recv-keys EA8CACC073C3DB2A
gpg: key EA8CACC073C3DB2A: public key "Launchpad PPA for Linux Uprising" imported
gpg: Total number processed: 1
gpg:               imported: 1
Next, add the Java installer repository with the following command:
add-apt-repository ppa:linuxuprising/java
Next, update the repository and install the Oracle Java 11 SE with the following command:
apt-get update -y
apt-get install oracle-java11-installer-local -y
After the installation, verify the installed version of Java by running the following command:
java -version
You should see the installed Java version in the following output:
java version "11.0.8" 2020-07-14 LTS
Java(TM) SE Runtime Environment 18.9 (build 11.0.8+10-LTS)
Java HotSpot(TM) 64-Bit Server VM 18.9 (build 11.0.8+10-LTS, mixed mode)
Set or Change the Java Default Version
If you are using multiple version of Java in your system. You can easily set or change the default Java version as per your development needs.
To change the default Java version, run the following command:
update-alternatives --config java
You should see that there are three Java versions installed in your system and active version is Oracle Java 11.
There are 3 choices for the alternative java (providing /usr/bin/java).

  Selection    Path                                                Priority   Status
------------------------------------------------------------
  0            /usr/lib/jvm/java-11-openjdk-amd64/bin/java          1111      auto mode
  1            /usr/lib/jvm/adoptopenjdk-8-hotspot-amd64/bin/java   1081      manual mode
  2            /usr/lib/jvm/java-11-openjdk-amd64/bin/java          1111      manual mode
* 3            /usr/lib/jvm/java-11-oracle/bin/java                 1091      manual mode

Press  to keep the current choice[*], or type selection number:
Type the number of the installed version that you want to set as a default version and hit Enter.
You will also need to do this for other Java commands including javac as shown below:
update-alternatives --config javac
Set JAVA_HOME Environment Variable
Some applications use the JAVA_HOME environment variable to determine the Java installation location. In this case, you will need to set the JAVA_HOME environment variable for your default Java version.
First, you will need to locate the path of the Java installation. You can find it using the following command:
update-alternatives --config java
You should see the following output:
There are 3 choices for the alternative java (providing /usr/bin/java).

  Selection    Path                                            Priority   Status
------------------------------------------------------------
  0            /usr/lib/jvm/java-11-openjdk-amd64/bin/java      1111      auto mode
  1            /usr/lib/jvm/java-11-openjdk-amd64/bin/java      1111      manual mode
* 2            /usr/lib/jvm/java-11-oracle/bin/java             1091      manual mode
  3            /usr/lib/jvm/java-8-openjdk-amd64/jre/bin/java   1081      manual mode
As you can see, the path of the all Java version are as follows:
- OpenJDK 11 is located at /usr/lib/jvm/java-11-openjdk-amd64/.
- Oracle Java is located at /usr/lib/jvm/java-11-oracle/.
- OpenJDK 8 is located at /usr/lib/jvm/java-8-openjdk-amd64/.
Next, you will need to copy the path of your desired Java version and add it to the /etc/environment file:
nano /etc/environment
Add the following line for Oracle Java 11 version:
JAVA_HOME="/usr/lib/jvm/java-11-oracle/"
Save and close the file then activate the environment variable using the following command:
source /etc/environment
Next, you can verify the Environment variable which you have set using the following command:
echo $JAVA_HOME
You should see the following output:
/usr/lib/jvm/java-11-oracle/