What is DayZ? Why is it Popular?
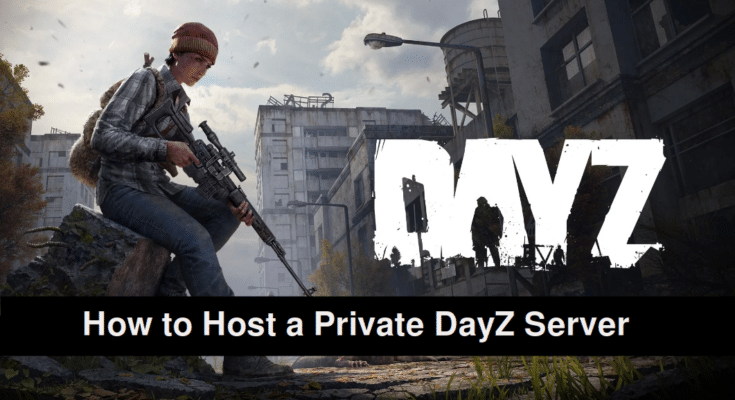
DayZ started as an add-on/Mod for ARMA 2 in April 2012. It was created by Dean Hall, who used his real-life military knowledge to make the game more challenging.
People loved its adventure so much that the company that made ARMA 2 [Bohemia Interactive], worked with Dean Hall to make DayZ its game.
The early version of the game was released on the platform Steam in December 2013.
Since then, DayZ has greatly improved with better graphics and new elements. It has a million fans who like the tough survival experience it offers.
Also Read
Best DayZ Server Hosting Services
DayZ Server Requirements
Before you set up your own DayZ server, it’s important to understand the system requirements needed to run it smoothly, especially if you’re aiming for a stable experience with multiple players. Whether you’re hosting on Windows or Linux, your server needs enough power to handle world generation, real-time player interactions, and mod support.
Here’s a breakdown of the recommended DayZ server requirements:
✅ Minimum Requirements (For Testing or Small Private Sessions)
CPU: Dual-core 3.0 GHz processor
RAM: 4 GB
Storage: 10 GB free disk space (SSD recommended)
Network: 5 Mbps upload/download
Operating System: Windows Server 2016+, Ubuntu 20.04+
✅ Recommended Requirements (For Public or Modded Servers)
CPU: Quad-core 3.6+ GHz (Intel i5/i7 or AMD Ryzen 5)
RAM: 8–16 GB (more if running mods)
Storage: 20–30 GB SSD (faster loading and map performance)
Network: 10+ Mbps upload speed (for 10+ players)
Operating System: Windows Server 2019 or Ubuntu 22.04
Why Choose a Private DayZ Server?
You may wonder why you would prefer a personal DayZ server when you can join an official server, which is public and free of cost.
The answer is- DayZ is a heavily multiplayer game, and creating your own DayZ server gives you a more personalized gaming experience.
If you’re a dedicated gamer, you will hate the experience public servers provide.
For example, in a public DayZ server, you’ve to:
- Depend on the host for everything.
- Play at the level that is already set.
- Wait for a long time to join the servers. You have no option to customize your DayZ server.
- You don’t know what mod, map, and world they use.
But with your own DayZ server, everything’s just the opposite.
With a reliable private DayZ server:
- You’re the owner with full control.
- You never lose your games with backups.
- Your DayZ server is protected with DDoS protection.
- You can invite 100+ friends and build your user base.
- Your DayZ server remains online 24/7.
- You can add your favorite mods and update them from time to time.
Now, if you’re convinced to go for a private DayZ server hosting, you must gather the necessary tools.
What are they? How do we gather them?
Let’s see it.
Host a DayZ Server For Free on Cloud
If you want to host your own DayZ game server on a VPS server, choose the Kamatera Cloud. They provide a fast VPS with a 30-day trial period to test the server.
What Do You Need to Host Your Own DayZ Server?
The most basic resources to host your own DayZ server include –
- SteamCMD – SteamCMD is software that allows you to download and manage DayZ server files, mods, and updates. Without it, you can’t even get started with your DayZ server setup.
- Stable Internet Connection – When playing a multiplayer game, you will need an uninterrupted internet connection with your choice of mods. A stable connection ensures smooth gameplay without lag, which is crucial for optimal bandwidth usage.
- Dedicated Computer or VPS (Virtual Private Server) – You should have a dedicated computer or a VPS to run your own DayZ server.
A dedicated computer solely runs your small server, guaranteeing reliable performance. On the other hand, a VPS is a remote, powerful server you rent, ensuring 24/7 availability with available, scalable options.
These three are the most basic resources to set up your own DayZ server.
Besides these, you will need the following resources to set up your DayZ game server.
- DayZ Server Files to run the DayZ game.
- Server Configuration File (serverDZ.cfg) is your server’s control panel.
- Mods if you want to customize your server and add new features.
- Use firewall and port forwarding settings to allow players to connect to your server.
- Admin permission to allow other gamers to join your server.
You must download and install these essential components to run and enhance your game.
Also Read
How to Make a Private DayZ Server (PC, Xbox One, PS4)
This section will explain all the necessary steps to make your own private game server on PC, Xbox One, and PS4.
Step 1 – Install SteamCMD and server files
This is the first thing you will need for your server.
To install SteamCMD, you need to fulfill the minimum system requirements.
Prepare Your System
Check whether your computer or server meets the following requirements:
Operating System – Windows/Linux based
Processor – Intel core i5-4430
RAM – 8 GB
Graphics – NVIDIA GeForce GTX 760 or AMD R9 270X
DirectX – Version 11
Storage – It is suitable for SteamCMD.
Network – An active and stable Internet connection
Downloading SteamCMD
Once the system requirements are checked, it’s time to download.
- Launch your web browser and go to the official SteamCMD download page.
- Once you click on the link, it starts downloading automatically.
Extract SteamCMD
When the download is complete, locate the downloaded “steamcmd.zip” in your computer’s downloads folder.
- Right-click on the zip files.
- Select “Extract All” or use a program like WinRAR or 7-Zip to extract its contents.
- Choose a folder/create a new folder to extract the SteamCMD files.
- Click “Extract” to extract the zip.
Run SteamCMD
- Navigate to the folder.
- Locate the “steamcmd.exe” [Windows] or “steamcmd.sh” (Linux).
- Double-click on it to launch SteamCMD.
Update SteamCMD
After launching, it will automatically update itself to the latest version. Once the update is complete, you’ll see the SteamCMD command-line interface.
Install the DayZ Server Files
1. In the SteamCMD command-line interface, you’ll see a prompt that looks like this: `Steam>`
2. Type the following command and press Enter to log in anonymously [you don’t need a Steam account for this]: login anonymous
3. SteamCMD will connect to the Steam servers.
4. To set the installation directory for your game server, use the following command [replace “C:\DayZServer” with your preferred directory]: force_install_dir C:\DayZServer
5. Now, to download and install the DayZ server files, enter this command: app_update 223350 validate
6. SteamCMD will begin downloading and installing the necessary files for your server.
This process may take a while, depending on your internet speed.
Exit SteamCMD
Once the installation is complete, type: quit to exit.
That’s it. You’ve successfully downloaded and installed SteamCMD.
You can now configure and launch your DayZ game server using the server configuration file and other settings.
Step 2 – Configure DayZ server
After setting up SteamCMD, you need to configure your DayZ game server from your Steam library. It is important because it allows you to customize your server per your preferences.
Here are the necessary steps:
- Locate Your Server Files.
- Find the “serverDZ.cfg” template in the server files directory.
- Edit “serverDZ.cfg” with a text editor like Notepad.
- Locate the “hostname” parameter. You can change it to your desired server name.
- If you want to restrict access, set a password using the “passwordAdmin” and “password” parameters.
- You can also modify the “difficulty” parameter to set the DayZ’s difficulty level. [0 = easy, 1 = normal, 2 = hard]
- Define the number of player slots using the “maxPlayers” parameter.
- Save the file after making adjustments.
- Upload the edited “serverDZ.cfg” to your DayZ server directory.
- Restart your DayZ host for the changes to take effect.
Your server configuration is now set up with custom settings. You can adjust other parameters as per your preferences.
Step 3 – Set Up Admin Permissions
If you want to assign admin roles to your other friends in hosting, you typically use the “users.xml” to grant admin permissions.
Here are the steps you need to set up admin permission:
- Add specific players to the admin list within the “users.xml” to assign admin roles. Each admin entry should look like this:
<admin>
<guid>Player_GUID</guid>
<permission_level>Admin_Level</permission_level>
</admin>- Replace `Player_GUID` with the unique Steam64 ID of the player you want to make an admin.
- Replace `Admin_Level` with the desired permission level [Typically 1 for basic admin rights].
- You can add multiple admin entries for different players, each with their Steam64 ID and permission level.
- After adding or editing the admin entries, save the “users.xml”.
- To apply the changes, restart your server.
Once the server restarts, the specified players will have admin rights.
Step 4 – Add and Update Mods in the DayZ Server
If you want to alter or expand the gameplay of DayZ, you can install mods on your private server.
With the help of mods, you can bring diversity to the game and offer various play styles, environments, and challenges. You can explore new terrains, use unique weapons, and encounter different types of zombies or creatures. It allows you to tailor your DayZ experience to your liking.
Add Mods to the DayZ Server
Begin by browsing mod repositories like the Steam Workshop or other mod-sharing platforms to find mods you want to add to your server.
You can also subscribe to mods you like. This will download and install them on your local DayZ client.
Follow the following steps after that:
- Edit your server’s configuration files, usually “serverDZ.cfg,” using a text editor.
- In the configuration file, locate the “mods” section.
- Specify the IDs of the mods you want to enable on your server.
- Add each mod’s ID under “mods” like this:
mods[] = { "mod_id_1", "mod_id_2", // Add more mod IDs as needed };- Replace “mod_id_1,” and “mod_id_2,” with the actual IDs.
- Save the configuration file.
- Restart your server.
This will load the selected mods when the server starts.
Updating Mods
Step 5 – Configure Port Forwarding and Firewall
Port forwarding allows players outside your local network to access your DayZ server. Without it, your server would remain hidden behind your router, making it inaccessible to external players
Moreover, properly configured port forwarding ensures low-latency connections, contributing to a smoother DayZ gaming experience. You and your friends won’t experience lags or delays caused by network issues.
Port forwarding enables players to locate and join your server online seamlessly for multiplayer games like DayZ, where players connect from different parts of the world.
Here are the steps to configure port forwarding on your router and adjust firewall settings:
1. Find Your Router’s IP Address:
- Launch a web browser on a device connected to the same network as your router.
- In the address bar, type your router’s IP address.
- Common IP addresses include 192.168.0.1 or 192.168.1.1. You can usually find this information in your router’s manual or on the router itself. Check for it.
2. Access Router Settings:
You’ll be prompted to enter your router’s username and password. Check your router’s manual for default login credentials if you haven’t changed these.
- Once logged in, navigate to the port forwarding section.
- Depending on your router’s brand and model, this location may vary, but it’s often found under “Advanced Settings” or “Firewall.”
3. Create a Port Forwarding Rule:
- In the port forwarding section, look for an option to create a new port forwarding rule.
- Create a rule that specifies the following:
Service/Port: Enter the port number used by your DayZ game server. The default is 2302 for the game and 27016 for Steam.
- Internal IP Address: Input the local IP address of the computer or device running your DayZ.
- Protocol: Select “TCP/UDP” or “Both” to cover all necessary protocols.
- Description: Give your rule a name for easy identification.
4. Save and Apply:
Save the new port forwarding rule and apply the changes. Your router will likely require a restart for the settings to take effect.
5. Adjust Firewall Settings:
If your router has a built-in firewall, configure it to allow traffic on the port you’ve forwarded. This ensures external connections on the specified port can reach your DayZ server.
6. Confirm Open Ports:
You can use online port-checking tools to verify that the ports are open and accessible from outside your network. This helps ensure that players can connect without issues.
You’ll have successfully configured port forwarding for your DayZ server by following these steps.
Step 6 – Launch Your Own Private DayZ Server
With all the necessary settings and installations done, now it’s time to start your server. To launch your server, follow these steps:
- Locate the “DayZServer_x64.exe” file in your server’s directory.
- Double-click it to run the server.
- A console window will open, displaying various server information and logs.
- Monitor this window for any error messages or warnings.
- Depending on your server’s hardware and the number of mods, the server will take some time to load.
- Once loaded, the console will display messages about the server’s initialization. This includes loading mods, maps, and other settings.
- When you see the message “Server ready to accept connections,” your DayZ server is running.
Step 7 – Resolve Common Troubleshooting Problems
Throughout the setting of your DayZ server, you might encounter many common issues. How will you resolve them?
By checking the following things:
1. Port Forwarding
Ensure that your router’s port forwarding settings are correctly configured, allowing external players to connect to your server.
2. Firewall
Check your server’s firewall settings to ensure that the required ports (usually 2302 and 27016) are open for both TCP and UDP traffic.
3. ServerDZ.cfg Errors
If your serverDZ.cfg file contains errors or typos, it can lead to server startup failures. Double-check the file for accuracy, especially commas, brackets, and quotation marks.
4. Mods Compatibility
Incompatibility issues with mods can cause server crashes. Ensure that all mods are up-to-date and compatible with your server version.
5. Server Hardware
If your server experiences– lag or crashes frequently, it might be due to insufficient hardware resources. Consider upgrading your server’s hardware for better performance.
6. Logs Analysis
Regularly review the console window for error messages or warnings. These messages often provide clues about issues that need attention.
7. Server Updates
Keep your DayZ server and mods updated to the latest versions. Outdated server files or mods can lead to compatibility problems.
8. Community Support
If you encounter persistent issues, seek assistance from the DayZ server hosting community or forums. Experienced players and administrators can often provide valuable insights and solutions.
Step 8 – Invite Players and Build Community
DayZ is all about multiplayer; its experience doubles with more players. But that’s not all. There are many reasons you should invite new players and build your own community for DayZ.
Here’s why:
- It keeps players coming back, ensuring your DayZ server’s longevity.
- A supportive community helps resolve conflicts and issues more effectively.
- Engaged players create content, videos, and streams to promote your DayZ game.
- Players’ feedback helps you improve the server and tailor it to their preferences.
- A positive atmosphere retains players, reducing the need for constant recruitment.
- Ultimately, it enhances the DayZ gaming experience.
In summary, an engaging community benefits your players and ensures the overall success and growth of your DayZ server.
Step 9 – How do you promote your DayZ server?
You can promote your DayZ server and grow your community with these simple yet effective strategies:
Getting the Word Out:
Start by sharing your server details on gaming forums and communities. Tell people about your server and why they should join.
Social Media Magic!
Why not use your social media platforms and share updates and stories of DayZ from your server?
You can do it with the help of the following steps:
- Engage in DayZ forums and communities like Reddit’s r/DayZ Servers, Steam Community, and Bohemia Interactive Forums.
- List your server on platforms like DayZ Servers and TopConanServers.
- Organize Events. Plan in-game events like treasure hunts or zombie battles. This keeps players engaged and excited.
- Create profiles on Twitter, Facebook, and Instagram. Share regular updates and engage players.
- Collaborate with YouTubers, Twitch streamers, and bloggers for server spotlights and reviews.
- Set up a server for real-time communication with your player base.
- Highlight what sets your server apart, like unique mods or events.
- Listen to the players and ask for suggestions/feedback to improve.
In this way, you can promote your server and nurture a positive player group.
Final Thoughts: How to Create a DayZ Server
Finally, you’ve unlocked the world of DayZ game server hosting. Now it’s your turn to shape the rules and begin the adventure.
Whether you prefer private or official servers, it’s all about making your mark in the apocalypse. Gather your squad to begin this journey, and create your own stories.


