Project Zomboid is one of the most detailed zombie survival games available today. While playing solo can be rewarding, the game truly shines when experienced with friends on a dedicated multiplayer server. Whether you’re creating a private survival world, running a roleplay community, or hosting a heavily modded apocalypse, having your own server gives you complete control over the experience.
In this guide, you’ll learn how to host a Project Zomboid server, how to make a Project Zomboid server from scratch, how to join a Project Zomboid server, and how to play Project Zomboid multiplayer with friends. We’ll also cover the differences between self-hosting and cloud hosting, along with why many server owners eventually move to cloud platforms such as Kamatera for improved uptime and easier management.
Quick Answer: How to Host a Project Zomboid Server
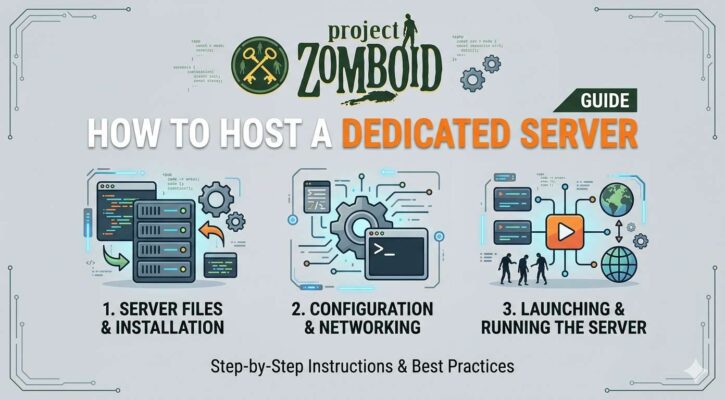
To host a Project Zomboid server, install SteamCMD, download the Project Zomboid Dedicated Server files using App ID 380870, configure your server settings, open the required ports, and launch the server. Players can then connect using your public IP address.
While hosting from your own PC is possible, many players choose cloud hosting because it eliminates common challenges such as port forwarding issues, home internet limitations, and keeping a computer running 24/7. If you’re new to cloud hosting, Kamatera offers a 30-day free trial that allows you to test a Project Zomboid server before committing to a paid deployment.
At a Glance
| Question | Answer |
|---|---|
| Can you host a Project Zomboid server yourself? | Yes |
| Do you need SteamCMD? | Yes |
| Can friends join your server? | Yes |
| Is port forwarding required for home hosting? | Usually |
| Can you host on Linux? | Yes |
| Is cloud hosting easier than home hosting? | For most players, yes |
| Can you use mods on a dedicated server? | Yes |
| Can you test cloud hosting before paying? | Yes, with Kamatera’s 30-day free trial |
Why Trust This Guide?
This guide is based on the dedicated server installation process used by Project Zomboid communities and server administrators. It covers both self-hosted and cloud-hosted deployments and focuses on practical setup steps rather than theory.
Whether you’re hosting for a few friends or building a larger multiplayer community, the recommendations below reflect the most common and reliable approaches used by experienced server owners.
Why Host Your Own Project Zomboid Server?
Public servers can be fun, but they come with limitations.
You may encounter:
- Server wipes
- Restrictive rules
- Limited mod support
- Performance issues
- Overcrowded worlds
- Unpredictable administration
Running your own server solves these problems.
Benefits include:
- Full control over mods and settings
- Persistent worlds that stay online
- Private multiplayer access
- Better community management
- Complete customization of gameplay rules
- Control over updates and maintenance schedules
For players who want a consistent multiplayer experience, dedicated hosting is often the best option.
Home Hosting vs Cloud Hosting: Which Is Better?
Before you start the installation process, you’ll need to decide where your server will run.
Home Hosting
Running a Project Zomboid server from your own PC is a common starting point.
Advantages
- No monthly hosting costs
- Complete hardware control
- Good for small groups
Disadvantages
- Requires strong upload bandwidth
- Your computer must remain powered on
- Port forwarding can be confusing
- ISP outages affect server availability
- Hardware upgrades become your responsibility
Cloud Hosting
Cloud hosting allows you to run your server in a data center instead of your home.
Advantages
- Better uptime
- Faster network connections
- Easy scalability
- Remote management
- Dedicated resources
Disadvantages
- Monthly hosting costs
- Initial setup learning curve
Hosting Comparison Table
| Feature | Home PC | Cloud VPS | Dedicated Server |
| Monthly Cost | Low | Moderate | Higher |
| Uptime | Moderate | High | Very High |
| Scalability | Limited | Excellent | Excellent |
| Performance | Depends on Hardware | Consistent | Excellent |
| Maintenance | High | Moderate | Moderate |
| Remote Access | Limited | Yes | Yes |
| Best For | Small Friend Groups | Growing Communities | Large Communities |
For most Project Zomboid players, a cloud VPS provides the best balance between cost, performance, and flexibility.
Why Many Players Move to Kamatera
Many players begin by hosting from their home PC. Eventually, they encounter challenges such as:
- Internet bandwidth limitations
- Power outages
- Port forwarding issues
- Hardware bottlenecks
- Increased player counts
This is where cloud hosting becomes attractive.
Recommended Hosting Option for Most Players
If you’re hosting for more than a few friends, a cloud server is usually the easiest solution.
Kamatera allows you to:
✓ Deploy a cloud server in minutes
✓ Scale CPU and RAM as your community grows
✓ Keep your server online 24/7
✓ Choose from multiple global data center locations
✓ Access your server remotely
✓ Test the platform with a 30-day free trial
Rather than worrying about home networking and hardware maintenance, you can focus on building your multiplayer world.
Project Zomboid Server Requirements
Project Zomboid becomes increasingly resource-intensive as you add players, mods, and larger maps.
Minimum Requirements
| Component | Recommended |
| CPU | 4 Dedicated Cores |
| RAM | 8GB |
| Storage | SSD |
| Network | 5 Mbps Upload |
| Operating System | Windows or Linux |
Recommended Resources by Player Count
| Players | Suggested CPU | Suggested RAM | Typical Use Case |
| 1-5 Players | 2 vCPU | 4GB | Vanilla Gameplay |
| 5-10 Players | 4 vCPU | 8GB | Lightly Modded Server |
| 10-20 Players | 6-8 vCPU | 16GB | Community Server |
| 20+ Players | 8+ vCPU | 32GB+ | Large Modded Worlds |
If you’re planning to run extensive Workshop mods, allocate additional RAM whenever possible.
How to Make a Project Zomboid Server
Now let’s walk through the actual installation process.
Step 1: Install SteamCMD
SteamCMD is Valve’s command-line tool used to download dedicated server software.
To install SteamCMD:
- Download SteamCMD.
- Create a server directory.
- Extract the files into the directory.
Example locations:
Windows
C:\pzserver
Linux
/home/user/pzserver
SteamCMD doesn’t require a traditional installer.
Step 2: Download the Dedicated Server Files
Launch SteamCMD.
For Windows:
steamcmd.exe
For Linux:
./steamcmd.sh
Then run:
login anonymous
force_install_dir ./pzserver
app_update 380870 validate
quit
The App ID 380870 downloads the official Project Zomboid Dedicated Server package.
When complete, you’ll have a fresh installation ready for configuration.
Step 3: Configure Your Server
Navigate to:
Server/servertest.ini
This file controls your server settings.
Important options include:
- PublicName
- PublicDescription
- Password
- MaxPlayers
- SteamVAC
You can also customize gameplay settings through:
servertest_SandboxVars.lua
Popular adjustments include:
- Zombie population
- Loot rarity
- Infection settings
- XP multipliers
- Day length
- Vehicle availability
These settings determine how challenging or casual your multiplayer experience becomes.
Step 4: Configure Networking
To allow other players to connect, you’ll need to open the appropriate ports.
Home Hosting
Forward:
| Protocol | Port |
| UDP | 16261 |
| TCP/UDP | 8766-8767 |
These ports should point to your server’s local IP address.
Cloud Hosting
If you’re using a VPS or cloud server, simply open the same ports within your firewall settings.
This is one reason many players find cloud hosting easier than home hosting.
Step 5: Launch the Server
Windows:
start-server.bat
Linux:
./start-server.sh -servername servertest
The first startup may take several minutes while the world is generated.
Once completed, your server will be available for multiplayer connections.
Hosting a Project Zomboid Server on Kamatera
If you’re using Kamatera, the setup process remains largely the same:
- Deploy a Windows or Linux cloud server.
- Connect via Remote Desktop or SSH.
- Install SteamCMD.
- Download Project Zomboid Dedicated Server files.
- Configure networking rules.
- Launch the server.
Because the server runs in a professional data center, you avoid many of the limitations associated with residential internet connections.
For players who want to test cloud hosting without committing immediately, Kamatera’s 30-day free trial provides an easy way to evaluate server performance, uptime, and multiplayer stability.
How to Join a Project Zomboid Server
Once your server is online, connecting is straightforward.
If you’re wondering how to join a Project Zomboid server, follow these steps:
- Launch Project Zomboid.
- Select Join Server from the main menu.
- Enter the server IP address or hostname.
- Enter the server password if one is configured.
- Create your character.
- Join the world.
After connecting successfully, you’ll spawn into the shared multiplayer environment and begin your survival journey.
Troubleshooting Connection Issues
If players can’t connect:
- Verify the server is online.
- Confirm the correct IP address is being used.
- Check firewall settings.
- Verify port forwarding is configured correctly.
- Ensure everyone is running the same Project Zomboid version.
Most connection problems stem from networking issues or version mismatches.
Project Zomboid How to Play With Friends
One of the most common questions new players ask is: Project Zomboid how to play with friends?
There are two primary methods:
Option 1: Host Directly Through the Game
The game includes a built-in host option.
Pros:
- Quick setup
- No separate server required
- Good for occasional sessions
Cons:
- The host must remain online
- Performance depends on the host’s PC
- Less stable for long-term worlds
Option 2: Use a Dedicated Server
A dedicated server runs independently from any player’s game session.
Pros:
- Available 24/7
- Better performance
- Supports larger groups
- Easier community management
- Improved mod support
Cons:
- Requires additional setup
For groups that play regularly, dedicated servers are generally the better long-term option.
How to Play Project Zomboid Multiplayer Successfully
Understanding how to play Project Zomboid multiplayer involves more than simply joining a server.
A well-maintained server creates a significantly better experience for everyone involved.
Keep Mods Organized
Project Zomboid has a massive modding community, but mods can also introduce problems if not managed correctly.
Best practices include:
- Using only actively maintained mods
- Keeping Workshop IDs updated
- Testing new mods before deploying them
- Maintaining a backup before major changes
When using mods, every player must have matching versions installed.
Schedule Regular Backups
Backups are one of the most overlooked aspects of server management.
Important directories include:
- /Zomboid/Saves/
- /Zomboid/Server/
Backing up these folders regularly can prevent catastrophic data loss.
Many experienced administrators schedule automatic backups daily.
Keep the Server Updated
Whenever Project Zomboid releases an update, update your server files using SteamCMD.
Run:
app_update 380870 validateThis ensures compatibility between your server and connected clients.
Monitor Performance
Watch for:
- High CPU utilization
- Memory shortages
- Slow save operations
- Increased player latency
Addressing performance issues early prevents larger problems later.
Why Many Growing Communities Choose Cloud Hosting
As servers become more popular, administrators often encounter limitations.
Common challenges include:
- Higher player counts
- Increased resource requirements
- Frequent uptime issues
- Home internet bottlenecks
- Hardware maintenance
Cloud hosting solves many of these problems.
Benefits of Cloud Hosting for Project Zomboid
- Always-on availability
- Flexible resource allocation
- Better networking
- Easier remote management
- Improved scalability
For communities expecting long-term growth, cloud hosting often becomes the more practical option.
Why Kamatera Stands Out
Kamatera allows server owners to:
- Deploy servers quickly
- Scale resources as needed
- Choose from multiple data center locations
- Maintain full root access
- Run Windows or Linux environments
For players who are unsure whether cloud hosting is right for them, Kamatera’s 30-day free trial provides an opportunity to test performance, uptime, and multiplayer stability before making a financial commitment.
Final Thoughts
Learning how to host a Project Zomboid server gives you complete control over your multiplayer experience. Whether you’re creating a private world for a few friends or building a large survival community, a dedicated server offers greater flexibility, stability, and customization than public alternatives.
The setup process is straightforward: install SteamCMD, download the dedicated server files, configure your settings, open the required ports, and launch the server. Once online, players can connect using your server IP and begin surviving together.
If you’re looking for the easiest long-term hosting solution, cloud infrastructure can eliminate many of the challenges associated with home hosting. Kamatera provides flexible cloud servers, scalable resources, global data center options, and a 30-day free trial that allows new users to test a Project Zomboid server before committing to a paid environment.
Whether you’re researching how to make a Project Zomboid server, how to join a Project Zomboid server, how to play Project Zomboid multiplayer, or Project Zomboid how to play with friends, a dedicated server remains the best way to create a persistent zombie apocalypse that’s always ready for your next session.
Frequently Asked Questions
How much RAM does a Project Zomboid server need?
Small vanilla servers can run with 4GB to 8GB of RAM. Modded servers and larger communities often benefit from 16GB or more.
Can I host a Project Zomboid server for free?
Yes. You can host from your own PC if your hardware and internet connection meet the requirements. Alternatively, Kamatera's 30-day free trial allows new users to test cloud hosting before purchasing a plan.
Do all players need the same mods installed?
Yes. Every player must have the same mods and versions installed to connect successfully.
Can I host a Project Zomboid server without port forwarding?
If you're hosting from home, port forwarding is usually required. Cloud hosting providers typically simplify this process because you only need to configure firewall rules.
Is Project Zomboid multiplayer peer-to-peer?
The game supports direct hosting, but dedicated servers provide a separate environment that remains online even when players disconnect.
How many players can a Project Zomboid server support?
The answer depends on hardware resources, mods, and world complexity. Properly configured servers can support dozens of concurrent players.