Python is one of the most popular, flexible and high-level programming language launched in 1991. It is a server-side programming language used to write scripts and build all kinds of applications. It is a simple, versatile and easy to learn so it is the first choice for beginners and experienced developers.
PIP is also known as “Preferred Installer Program” used to install and manage software packages written in Python. You can use pip to install packages listed in the Python Package Index (PyPI). By default, PIP comes pre-installed in the latest version of Python.
In this tutorial, You will learn –
- How to Install Python 3 on Windows 10
- How to Install PIP on Windows 10
- How to Install Python Virtual Environment on Windows 10
- How to Upgrade and Downgrade PIP on Windows 10
Prerequisites
- A system running Windows 10 or Windows server.
- An administrative user is configured on your system.
Step 1 – Download Python Installer
First, go to the Python download page and search for your desired version of Python. At the time of writing this tutorial, the latest version of Python 3 is version 3.9. You can see all available versions in the following screen:

If your operating system is 64-bit version then you need to download the Windows x86-64 executable installer. If your operating system is 32-bit then you need to download the Windows x86 executable installer. Click on the link to as per your operating system and Python version to download the Python installer.
Step 2 – Install Python from Downloaded Installer
Once the Python installer is downloaded, click on the installer to start the installation. You should see the following screen:
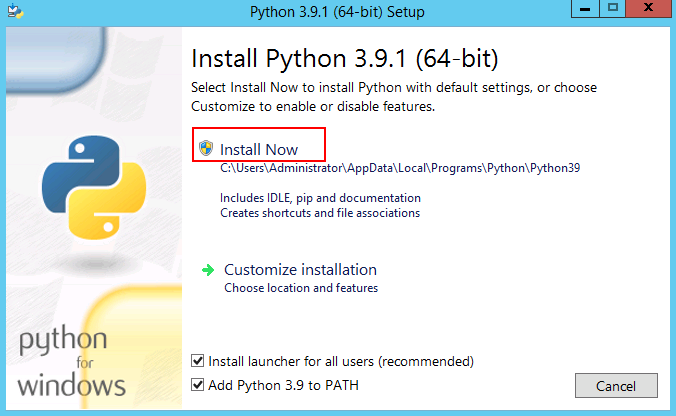
Select the Install launcher for all users and Add Python 3.9 to PATH checkboxes. Then, click on the Install Now button to start the installation. Once the installation has been finished, you should see the following screen:
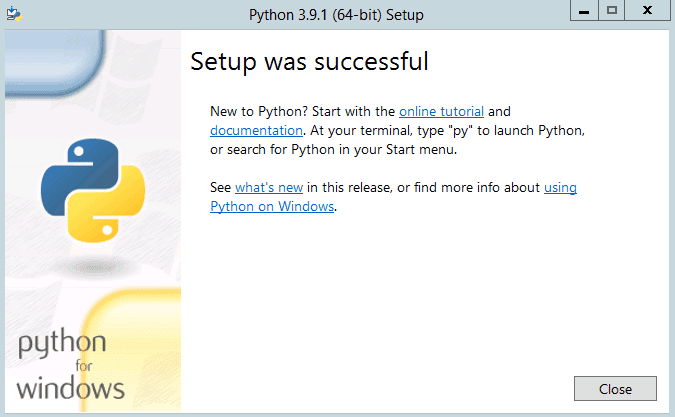
Click on the Close button to finish the installation.
Step 3 – Verify the Python Installation
After the successful installation, you will need to verify whether the Python was installed or not. By default, Python installed in the path C:\Users\Administrator\AppData\Local\Programs\Python\Python39.
If you can not found the Python at the given path, press Windows + R to open the Run as windows then type %appdata% and press Enter to open the AppData folder. Then, navigate to the directory Local => Programs => Python => Python39. You should see your Python binary as shown below:
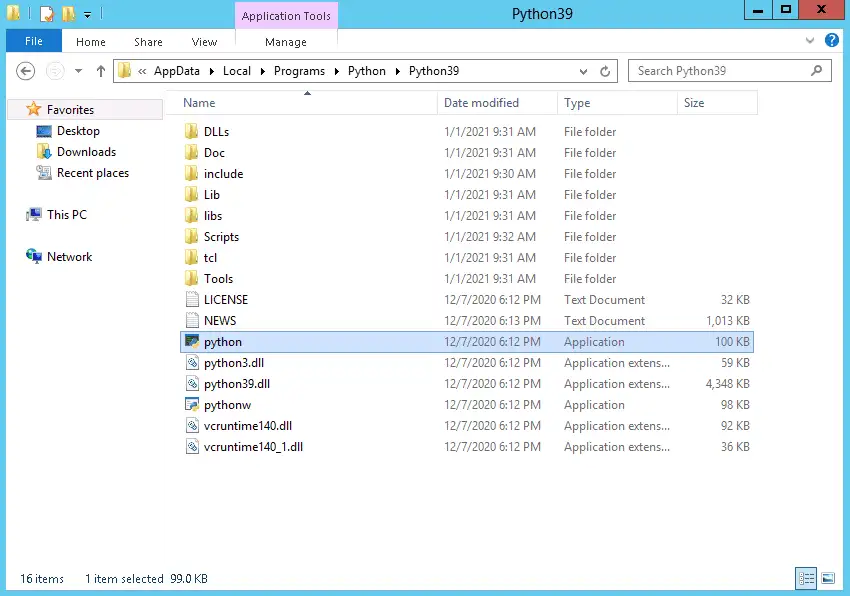
Now, double-click on the python binary. You should see the Python screen with version information.
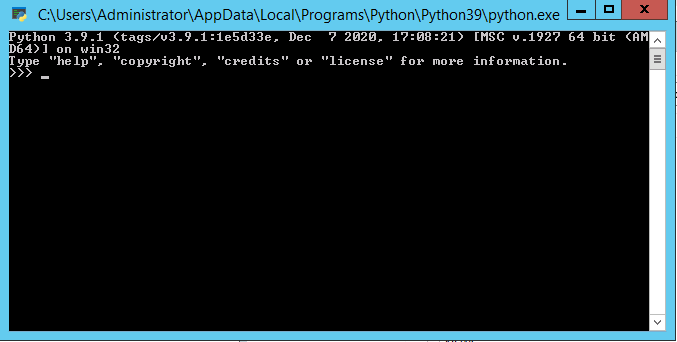
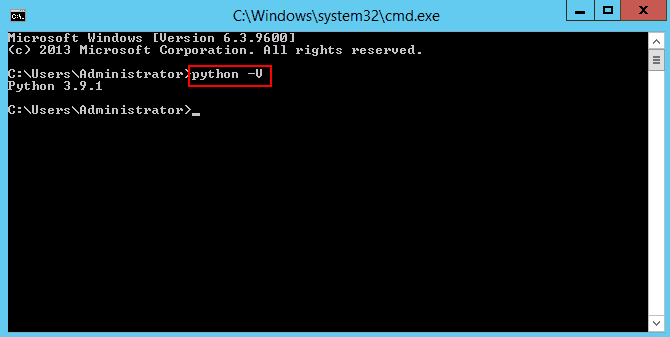
You can also verify the Python version from the Command prompt. Open your Windows command prompt and run the following command:
1 | python -V |
You should see your installed Python version in the following screen:
Step 4 – Install PIP on Windows
If you are a software developer then you will need to use pip to install various Python modules and packages for your own Python projects.
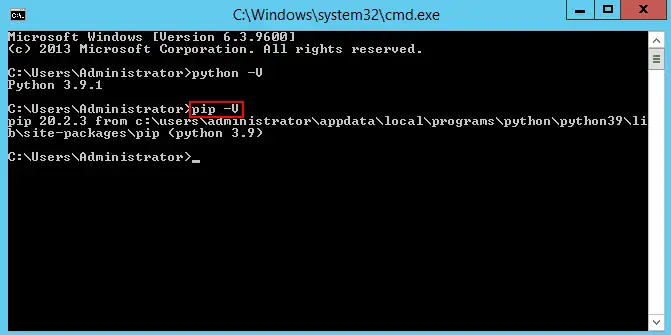
By default, PIP will be installed automatically with Python version 2.7.9+ and Python 3.4+. You can verify it using the Windows command prompt:
1 | pip -V |
You should see the installed version of PIP in the following screen:
You can see all option available with pip using the following command:
1 | pip help |
To install any package using pip, run the following command:
1 | pip install package-name |
To list all the installed pip packages use the command below:
1 | pip list |
Step 5 – Install Python Virtual Environment on Windows
Python Virtual Environment provides a mechanism to create an isolated “virtual” Python environment to work within. You can create a separate project within a virtual Python environment this will helps to prevent possible conflicts with the system’s wider Python environment.
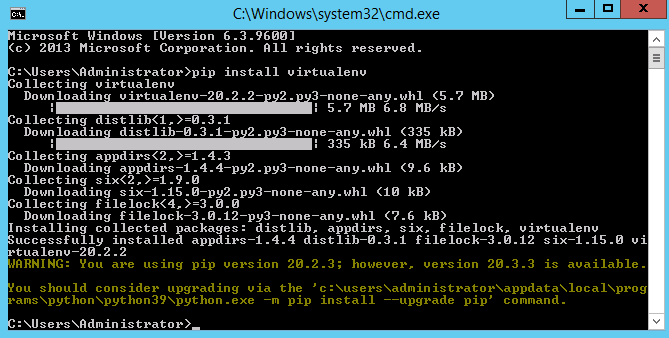
To install Python Virtual Environment on Windows, open the command prompt and run the following command:
1 | pip install virtualenv |
Once the installation is finished, you should see the following screen:
Step 6 – Upgrade PIP on Windows
It is always recommended to update the PIP version to the latest version. This will improve the functionality and fix the security vulnerability.
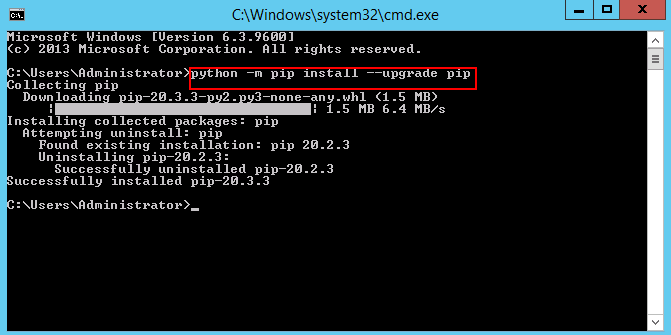
In order to upgrade pip to the latest version, open the Windows command prompt and run the following command:
1 | python -m pip install --upgrade pip |
You should see the following screen:
Step 7 – Downgrade PIP on Windows
You will need to downgrade the pip to the older version if your project does not work with the updated version of pip. You can downgrade the pip version by specifying your desired version as shown below:
1 | python -m pip install pip==18.2 |
Conclusion
In the above guide, you learned how to install Python 3 and PIP on Windows 10. You also learned how to install PIP and manage Python dependencies with PIP command. You can now create your Python project in the Virtual environment and manage it with PIP.