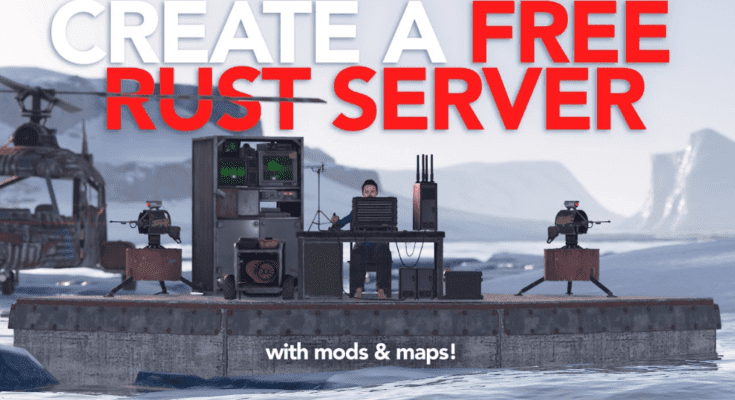
How to Make Your Own Private Rust Server for Free

how to create a rust server

Want to make your own Rust server without spending a dime on third-party hosting? You’re in the right place.

Hosting a Rust server on your own PC gives you complete control over the game world. You can experiment with mods, set custom rules, and play privately with friends or even just test your builds in peace without other players interfering.

In this step-by-step guide, we’ll walk you through everything you need to know to set up a private Rust server right on your personal computer. This is perfect for small group play, testing, or learning how server configuration works. And the best part? You don’t need expensive hardware or deep technical skills to get started.

Let’s dive in and get your server up and running!

System Requirements for Hosting a Rust Server on Your PC

Before you dive into setting up your server, it’s important to make sure your PC can handle it. Rust servers are CPU and RAM intensive, especially as more players join or as the world size increases.

Here’s a breakdown of what you need:

💻 Minimum Requirements (Small Private Server)

Ideal for playing solo or with a couple of friends:

ComponentMinimum Specs
CPUDual-core 3.0 GHz (Intel i5/Ryzen 3)
RAM6 GB (plus 4 GB for the game itself)
Storage20 GB SSD (HDD not recommended)
OSWindows 10/11 (64-bit) or Linux
Network5 Mbps upload speed

🔹 Note: These specs will get the server running, but performance may dip with mods or more than 5 players.

🚀 Recommended Requirements (Better Performance)

For a smoother experience and up to 10–20 players:

ComponentRecommended Specs
CPUQuad-core 3.4+ GHz (Intel i7/Ryzen 5+)
RAM12–16 GB
StorageNVMe SSD with 40 GB free space
Network10–20 Mbps upload speed

🔸 Using plugins or mods like uMod/Oxide? Aim for 16 GB RAM minimum.

Additional Tips

  • Avoid Wi-Fi: Use a wired Ethernet connection for stability.

  • Close background apps: Free up RAM and CPU while the server runs.

  • Use a static IP: It’s easier for your friends to reconnect after restarts.

📌 Need more details on specs? Check out our full Rust Server Requirements Guide.

Download and Install SteamCMD

To install and run a Rust server on your PC, you’ll first need SteamCMD, which is a command-line tool provided by Valve. It allows you to download and update game server files directly from Steam, even without launching the Steam client.

Let’s walk through how to install SteamCMD on a Windows system (you can also do this on Linux—more on that below).

📥 Step 1: Download SteamCMD

  1. Visit the official SteamCMD download page.

  2. Download the Windows ZIP archive.

  3. Extract the ZIP file to a folder like:

C:\steamcmd\

You should now see steamcmd.exe in that directory.

⚙️ Step 2: Run SteamCMD for the First Time

  1. Open Command Prompt.

  2. Navigate to the folder where you extracted SteamCMD:

cd C:\steamcmd
  1. Launch SteamCMD:

steamcmd
  1. SteamCMD will update itself and leave you with a Steam> prompt. You’re now ready to download the Rust server files.

🐧 Optional: SteamCMD on Linux

If you’re setting up the server on Linux, use these commands instead:

sudo apt update && sudo apt install -y lib32gcc-s1 wget tar
mkdir ~/steamcmd && cd ~/steamcmd
wget https://steamcdn-a.akamaihd.net/client/installer/steamcmd_linux.tar.gz
tar -xvzf steamcmd_linux.tar.gz
./steamcmd.sh

Once you’ve got SteamCMD ready, the next step is to use it to install the Rust Dedicated Server files.

Install the Rust Dedicated Server

Now that SteamCMD is up and running, it’s time to download and install the Rust Dedicated Server files. These are separate from the game itself and will allow your PC to run as a Rust server, even if the main game isn’t open.

Let’s break it down step by step.

🗂️ Step 1: Choose a Folder for Your Server Files

It’s a good idea to keep your server files separate from your games. Create a folder like:

C:\rust-server\

This will be your server’s home directory.

🧑‍💻 Step 2: Download the Rust Server with SteamCMD

  1. Open Command Prompt.

  2. Run SteamCMD and enter the following commands one by one:

login anonymous
force_install_dir C:\rust-server
app_update 258550 validate
quit

Here’s what each line does:

  • login anonymous logs you into Steam without an account.

  • force_install_dir sets the destination folder.

  • app_update 258550 is the Rust Dedicated Server app ID.

  • validate ensures all files are downloaded correctly.

🧠 Tip: This may take a few minutes depending on your internet speed.

🔁 To Update the Server Later

You can run the same commands again later to update your server whenever Facepunch releases a patch:

steamcmd +login anonymous +force_install_dir C:\rust-server +app_update 258550 validate +quit

Once installed, you’ll have a working server folder that contains files like:

RustDedicated.exe
start.bat (you’ll create this next)
steamapps/
server/

Configure Your Rust Server

Now that the Rust server files are installed, it’s time to configure your server’s basic settings, like its name, map size, number of players, and more.

This is done by creating a simple script file (called start.bat) that launches the server with your custom settings.

📝 Step 1: Create a Startup Script (start.bat)

  1. Open Notepad (or any text editor).

  2. Paste the following script:

RustDedicated.exe -batchmode -nographics ^
+server.hostname "My Rust Server" ^
+server.port 28015 ^
+server.identity "my_server" ^
+server.seed 12345 ^
+server.worldsize 3000 ^
+server.maxplayers 10 ^
+rcon.port 28016 ^
+rcon.password "supersecurepass" ^
+server.description "Welcome to my Rust server!" ^
+server.url "https://myserver.com"
  1. Save the file as start.bat in your C:\rust-server\ folder. Be sure to change the Save as type to “All Files” when saving from Notepad.

🔍 What Do These Settings Mean?

ParameterDescription
server.hostnameName shown in the Rust server list
server.portGame connection port (default: 28015)
server.identityFolder name to store saved data and config
server.seedWorld generation seed (random number = unique map)
server.worldsizeMap size (default: 3000; larger = more terrain)
server.maxplayersMax number of simultaneous players
rcon.portPort for remote console access (used with RCON tools)
rcon.passwordAdmin password for RCON commands
server.descriptionServer description shown in the browser
server.urlOptional website link (e.g., Discord, homepage)

🧠 Tip: Choose a memorable hostname and secure your RCON password to prevent abuse.

🧪 Step 2: Launch the Server

Double-click your new start.bat file. A command prompt window will open, and the server will begin loading. The first startup may take a few minutes.

When you see something like:

Server startup complete

You’re good to go!

Port Forwarding on Your Router

If you want others to join your Rust server, whether friends across town or players across the world—you’ll need to forward the correct ports on your router. Without this step, your server will only be accessible on your local network (LAN).

Let’s walk through how to do it.

📦 What Ports Do You Need to Forward?

Rust servers typically use the following:

PortProtocolPurpose
28015UDPGame port (used to connect to your server)
28016TCPRCON port (for remote admin access)

If you’re using different ports in your start.bat file, forward those instead.

🚪 Step-by-Step Port Forwarding Instructions

⚠️ Router interfaces vary by brand, but the steps are generally the same. Here’s a general guide.

  1. Find your local IP address (the one assigned to your PC):

    ipconfig
  2. Log in to your router’s admin page. Open a browser and go to 192.168.1.1 or 192.168.0.1. Enter your username and password (default often printed on the router)
  3. Find the port forwarding section. Usually under Advanced Settings, NAT, or Firewall
  4. Create two rules:
NamePortProtocolIP Address
Rust-Game28015UDP192.168.1.100 (your PC IP)
Rust-RCON28016TCP192.168.1.100

Save the rules and restart your router if needed.

🧠 Troubleshooting Tips

  • Make sure Windows Firewall or any antivirus isn’t blocking the ports

  • Ensure your PC has a static IP (so it doesn’t change after reboot)

  • If you’re using multiple routers (like modem + Wi-Fi router), make sure double NAT isn’t blocking your setup

Allow Rust Server Through Windows Firewall

Even if you’ve forwarded your ports correctly, Windows Defender Firewall could still block external connections to your Rust server. To make sure players can connect without issues, you’ll need to allow RustDedicated.exe through the firewall.

🪟 Step-by-Step: Add a Firewall Rule for Rust

  1. Open Windows Security Settings

    • Press Start, type “Windows Defender Firewall”, and open it.

  2. Click on “Allow an app or feature through Windows Defender Firewall” (on the left sidebar).

  3. Click the “Change settings” button at the top-right (you’ll need admin access).

  4. Click “Allow another app…”, then:

    • Browse to your Rust server folder (e.g., C:\rust-server\)

    • Select RustDedicated.exe

  5. Make sure both “Private” and “Public” checkboxes are checked

  6. Click Add → OK

🔥 Optional: Add Manual Rules (Advanced)

You can also manually add inbound and outbound rules for the ports:

  1. Go to Advanced Settings (on the left in Firewall window)

  2. Create a new inbound rule:

    • Type: Port

    • Protocol: UDP

    • Port: 28015

    • Allow the connection

  3. Repeat the same for TCP 28016 for RCON

  4. Do the same under Outbound Rules

✅ Done? Let’s Test It

  • Run your Rust server using start.bat

  • Ask a friend to connect via:

client.connect your-public-ip:28015

If the firewall is open and ports are forwarded, they should connect without issues.

🧠 Tip: Your public IP can be found at whatismyip.com

Launch and Test Your Rust Server

Now that your Rust server is fully installed, configured, and unblocked by the firewall, it’s time for the fun part, launching and testing your server.

This step ensures that your setup is working properly and that others can connect to it (if you want them to).

🟢 Step 1: Start Your Server

  1. Navigate to the folder where you saved your start.bat file (e.g., C:\rust-server\).

  2. Double-click start.bat to launch the server.

A terminal (Command Prompt) window will open and begin scrolling through startup logs. Don’t worry—it’s normal for the first launch to take a few minutes.

When you see:

Server startup complete

Your server is officially online!

🧪 Step 2: Connect to Your Server (From the Same PC)

  1. Launch Rust on Steam.

  2. Once in the main menu, press F1 to open the in-game developer console.

  3. Type:

client.connect localhost:28015

Then hit Enter.

✅ If everything is set up correctly, you’ll load directly into your custom server world.

👥 Step 3: Invite Friends to Join

If your server is for multiplayer, here’s how others can join:

  1. Give them your public IP address.
    You can find it by visiting whatismyip.com

  2. They should open Rust, press F1, and type:

client.connect YOUR.PUBLIC.IP:28015

(replace YOUR.PUBLIC.IP with your actual IP)

🧠 Common Connection Errors

Error MessageLikely Cause
Timed outPorts not forwarded or firewall blocked
DisconnectedWrong IP or server not fully booted yet
Not respondingServer crash or resource issue

📌 Double-check your firewall rules and router port forwarding if you run into problems.

Invite Friends to Join Your Rust Server

Once your Rust server is live and running, it’s time to invite your friends to join the action! Whether you’re planning a casual PvE session or a full-on PvP raid night, your server is only fun when others can join too.

🌍 Step 1: Share Your Public IP Address

To allow others outside your home network to connect, they need your public IP address.

  1. Go to whatismyip.com or search “what is my IP” on Google.

  2. Copy the IP address (e.g., 123.45.67.89)

  3. Share this with your friends, along with the server port.

Example connection command:

client.connect 123.45.67.89:28015

They’ll need to:

  • Launch Rust

  • Press F1 to open the console

  • Paste and run the command above

🧠 Important Notes

  • If you’ve customized your server port, be sure to include that port number in the connection command.

  • If your IP address is dynamic (i.e., changes periodically), consider setting up a dynamic DNS (DDNS) service like no-ip.com or DuckDNS so your friends can always connect using a domain (e.g., yourrust.ddns.net:28015).

  • Your friends must not be on the same local network to use the public IP. If they are, they should connect using localhost or your local IP instead.

🔧 Still Can’t Connect?

If your friends can’t connect:

  • Double-check port forwarding

  • Confirm Windows Firewall rules are allowing traffic

  • Make sure the server is running and has started successfully

  • Ensure you’re using your public IP, not the local one (e.g., 192.168.x.x won’t work remotely)

Install uMod (Oxide) for Plugins

Want to spice up your Rust server with teleportation, custom kits, VIP perks, and other cool features? That’s where uMod (formerly Oxide) comes in. It’s the most popular modding framework for Rust and lets you easily install plugins to customize gameplay.

This step is optional, but highly recommended if you want to run a community or enhance your server’s functionality.

📦 What Is uMod (Oxide)?

uMod is a lightweight plugin engine that lets server admins add features like:

  • Teleport commands (/home, /tpr)

  • Admin tools

  • Economy systems

  • Welcome messages

  • PvP rules and events

It doesn’t change the core game, it just adds plugin support.

⚙️ How to Install uMod (Oxide) on Your Local Rust Server (Windows)

⚠️ Always back up your server files before making changes!

  1. Download the latest Oxide build:
    Go to https://umod.org and download the latest Rust release.

  2. Extract the ZIP file:
    Use a tool like WinRAR or 7-Zip to extract the archive.

  3. Copy and overwrite files into your server directory (C:\rust-server\)

    • This will include new folders like oxide/ and overwrite some .dll files in the server’s RustDedicated_Data/Managed folder

  4. Restart your server

After a successful install, a new oxide/plugins/ folder will appear. This is where you’ll upload .cs plugin files.

🔌 Installing Plugins

  1. Visit the uMod plugin page

  2. Download any .cs plugin you want (e.g., Kits, Teleportation, NoDecay)

  3. Place the plugin file into the oxide/plugins/ folder

  4. Restart the server or run:

oxide.reload PluginName

🧠 Popular Plugins to Start With

Plugin NameWhat It Does
KitsLets you create starter or VIP kits
TPREnables teleportation between players
AdminRadarShows player locations for admins
Better ChatCustomize chat formatting and colors
Info PanelDisplays stats and timers on-screen

Troubleshooting Tips

Even with everything set up correctly, issues can pop up when hosting a Rust server on your PC. This section covers the most common problems and how to fix them quickly so you can get back to surviving, building, and raiding.

🚫 Problem 1: Server Won’t Start

Possible Causes:

  • Missing or corrupt files

  • Incorrect parameters in start.bat

  • Outdated SteamCMD or Rust server files

Fixes:

  • Run a full update using SteamCMD:

steamcmd +login anonymous +force_install_dir C:\rust-server +app_update 258550 validate +quit
  • Check your start.bat file for syntax errors (no blank lines, no missing ^ symbols on each line).

  • Ensure your PC meets the minimum system requirements.

🌐 Problem 2: Friends Can’t Connect

Possible Causes:

  • Port forwarding not configured properly

  • Firewall blocking RustDedicated.exe

  • Using local IP instead of public IP

Fixes:

  • Re-check that ports 28015 (UDP) and 28016 (TCP) are forwarded to your PC’s internal IP

  • Use whatismyip.com to confirm your public IP address

  • Make sure Windows Firewall allows RustDedicated.exe on both Private and Public networks

  • Temporarily disable firewall/antivirus to test

❌ Problem 3: Plugins Not Working

Possible Causes:

  • uMod not installed correctly

  • Plugin file is corrupted or outdated

  • Missing dependency plugins

Fixes:

  • Redownload the latest uMod build and reinstall it

  • Check the oxide/logs/ folder for plugin error messages

  • Ensure plugins are placed in the correct directory: oxide/plugins/

  • Use oxide.reload PluginName in the console after uploading new plugins

🔍 Problem 4: High Lag or Crashing

Possible Causes:

  • Not enough RAM or CPU resources

  • Too many entities (structures, corpses, items)

  • Large world size or overuse of plugins

Fixes:

  • Lower server.worldsize in your config

  • Increase RAM allocation (close background apps)

  • Use plugins like AutoPurge or EntityCleanup to remove unused items

  • Restart the server regularly

Conclusion: You’re Now Running Your Own Rust Server!

Congrats! You’ve just taken a huge step toward mastering Rust, not just as a survivor, but as a server admin too.

By hosting your own Rust server on your PC, you’ve gained complete control over how the game runs. Whether you’re experimenting with mods, setting up a private world for friends, or learning the ropes before going public, you now know how to:

  • Install and configure the Rust Dedicated Server

  • Forward ports and allow firewall access

  • Customize server settings and plugins with uMod

  • Troubleshoot common issues with confidence

👉 What’s next?

If you ever want to scale up (with more players, improved uptime, and reduced stress), you can always migrate your setup to a game server hosting provider.

📌 Want to explore more options? Check out:

Rust Server Hosting: The Ultimate Guide  – our full breakdown of hosting providers, pricing, modding, and scaling your community server.

Until then good luck out there, and have fun crafting your own Rust world!

FAQs About Hosting a Rust Server on Your Own PC

1. Can I run a Rust server and play the game on the same PC?

Yes, you can, but it depends on your hardware. Make sure you have at least 16 GB of RAM and a modern multi-core CPU. Running both the server and game simultaneously is resource-intensive.

2. Do I need a static IP address to host a server?

A static IP makes it easier for friends to reconnect to your server. If you have a dynamic IP (which changes over time), consider using a dynamic DNS service like No-IP or DuckDNS.

3. How do I find my public IP to share with friends?

Visit https://www.whatismyip.com or Google “what is my IP.” Share that IP with your server’s port like: client.connect 123.45.67.89:28015.

4. Why isn’t my server showing up in Rust’s public server list?

Locally hosted servers often don’t appear in the in-game browser, especially if NAT or firewall settings block external access. Use the direct connect command in the F1 console instead.

5. Do I need to open ports every time I reboot my PC?

No, but if your internal IP changes (due to DHCP), the port forwarding rules may break. To fix this, assign a static internal IP to your PC via your router.

6. Is uMod (Oxide) required to run a server?

No, Rust works without it. But if you want to use plugins and custom features, installing uMod is a must.

About Hitesh Jethva

Experienced Technical writer, DevOps professional with a demonstrated history of working in the information technology and services industry. Skilled in Game server hosting, AWS, Jenkins, Ansible, Docker, Kubernetes, Web server, Security, Proxy, Iptables, Linux System Administration, Domain Name System (DNS), and Technical Writing.

View all posts by Hitesh Jethva