If you’ve ever wondered how to make a FiveM server for free, you’re in the right place. Whether you’re running Windows or Linux computers, setting up your own GTA V FiveM server is a great way to gain complete control over your GTA V multiplayer world and enhance your gameplay experience, without paying for hosting. You can customize gameplay through different modifications, install mods, invite friends, and even build your own roleplay community.
In this guide, we’ll walk you through the entire process step by step, from initial installation, downloading FiveM server files, and configuring essential settings to launching your server successfully with your FiveM server connection address (IP Address). Whether you’re a beginner or an advanced user, this tutorial will help you set up a fully functional FiveM server on both Linux and Windows platforms, completely free. For assistance during the setup process, feel free to join our Discord community for support and tips.
Let’s get started and turn your
Let’s get started and turn your FiveM vision into reality.
Also Read
Best FiveM Server Hosting Providers
Why Host Your Own FiveM Server?
Hosting your own FiveM server offers several benefits compared to the base game:
- ✓Full Control: Customize settings, mods, and rules to suit your preferences.
- ✓Lag-Free Gameplay: Opt for a dedicated server or reliable host to minimize latency.
- ✓Private Games: Limit access to friends or your community for a more enjoyable experience.
- ✓Mod Support: Freely install and manage mods to enhance gameplay without restrictions.
- ✓Improved Security: Implement security measures to protect against hackers and cheaters found on public servers.
FiveM Server Minimum Requirements
Here are the minimum hardware requirements to host your own FiveM server, including options for Ryzen processors, which may vary depending on the number of players.
| Minimum | Recommended | |
| CPU | Intel Core 2 Q6600 @ 2.40GHz / AMD Phenom 9850 @ 2.5GHz | Intel Core i5 3470 @ 3.2GHz / AMD X8 FX-8350 @ 4GHz |
| GPU | NVIDIA 9800 GT 1GB / AMD HD 4870 1GB / Intel HD GT2 | NVIDIA GTX 660 2GB / AMD HD7870 2GB |
| RAM | 8GB (4 may work) | 16GB |
| Hard Disk | 105GB + ~4GB | 105GB + 8GB |
How to Create a FiveM Server with GravelHost or Kamatera?
GravelHost – Reliable Game Hosting
GravelHost is a popular choice for gamers looking to host FiveM game servers due to its easy-to-use control panel and robust DDoS protection. The setup is instant, allowing you to get your server up and running in no time. Optimized for low latency, GravelHost ensures smooth and responsive gameplay with the performance expected from providers utilizing multiple data centers, which is key for a hassle-free gaming experience.
Kamatera – Cloud Hosting for FiveM
For those who need customizable solutions, Kamatera offers scalable cloud hosting services that ensure the best performance. You can configure your virtual server’s CPU, RAM, and storage to exactly meet your gaming needs. Whether you’re hosting a large-scale multiplayer environment or a heavily modded game, Kamatera provides the flexibility and power to support it, ensuring that your server can handle the demands of any FiveM game scenario.
Try Kamatera with a 30-day Free Trial
| RANK | Fivem Hosting | Speciality | Price | |
|---|---|---|---|---|
| 1 | Gravel Host | Cheap and reliable | $5.00 - $28.80/month | |
| 2 | G-Portal | High performace | £5.73 - £190/month | |
| 3 | Zap Hosting | Official FiveM provider | $8.37/month | |
| 4 | ElixirNode | A very fast & budget-friendly option | $2 - $96/month | |
| 5 | Cubes | Trusted and affordable | $5.45 - $56.26/month |
How to Make a FiveM Server for Free
In this section, you will learn how to install a FiveM Server on Linux and Windows VPS.
How to Install a FiveM Server on Linux
In this section, we will show you how to make a FiveM server in Linux. We will use Ubuntu as an operating system for this tutorial.
Prerequisites
- A system running a Ubuntu Linux operating system(Get a Free Server from Kamatera Cloud. They offer a 30-day free trial).
- A root password or a user with sudo privileges.
Step 1 – Getting Started
First, you will need to install some required dependencies on your server. You can install all of them using the following command.
apt install screen wget git -y
After installing all the packages, you can proceed to install the FiveM server.
Step 2 – Download and Install FiveM Server
First, create a directory for the FiveM server using the following command.
mkdir ~/fivem-server
Next, visit the FiveM official download page as shown below:
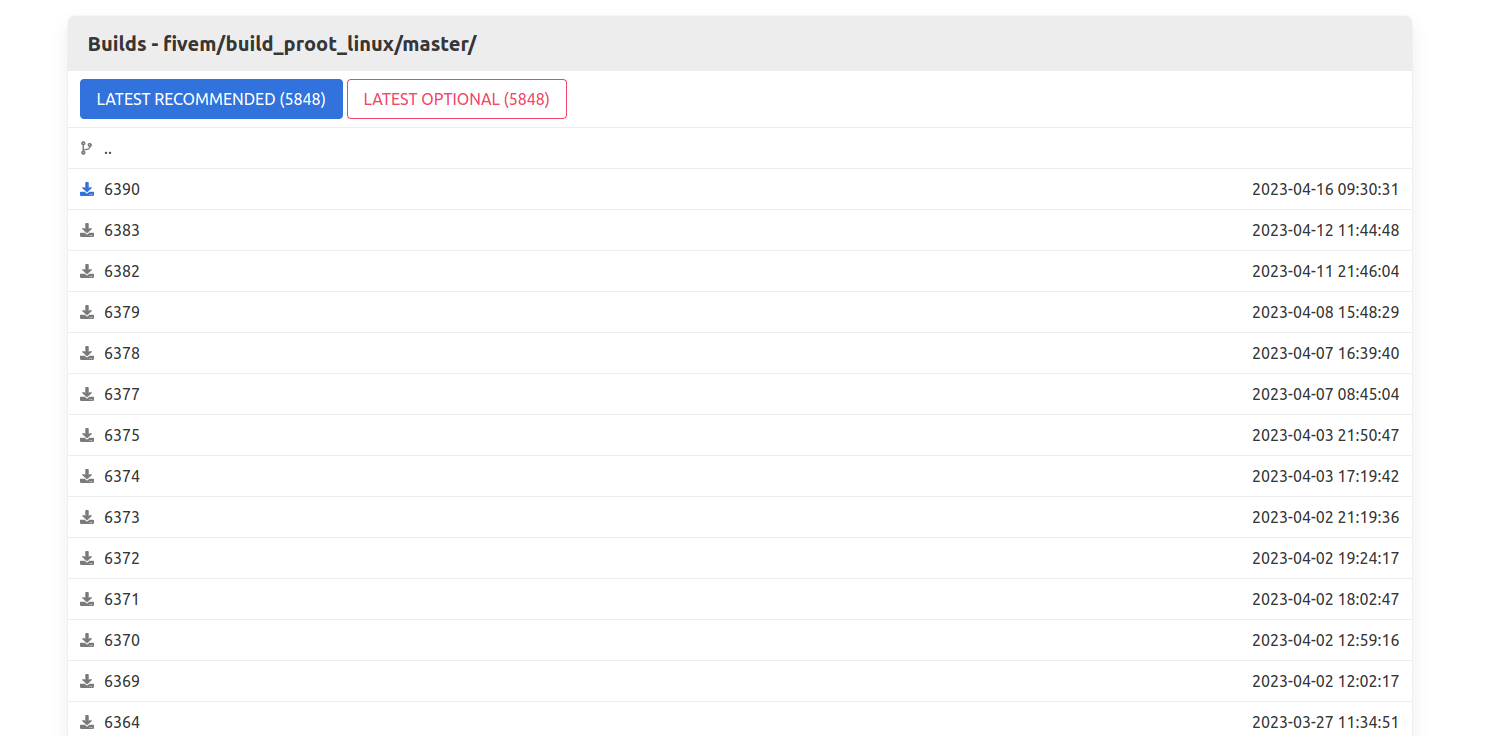
Next, pick your desired FiveM version, copy the download link of the FiveM server version, and run the following command to download it on your server.
cd ~/fivem-server
wget https://runtime.fivem.net/artifacts/fivem/build_proot_linux/master/6390-78d783f1cf263f85f3fb3158cf13e8bcecd21b7d/fx.tar.xz
Next, extract the downloaded file using the tar command.
tar -xvf fx.tar.xz
Next, you will also need to download the FiveM data to your server. You can download it with the git command.
git clone https://github.com/citizenfx/cfx-server-data ~/fivem-resources
Step 3 – Configure FiveM Server
Next, you will need to create a server.cfg configuration file to define all configurations and FiveM license information.
nano ~/fivem-resources/server.cfg
Add the following configurations:
endpoint_add_tcp "0.0.0.0:30120”
endpoint_add_udp "0.0.0.0:30120”

ensure mapmanager
ensure chat
ensure spawnmanager
ensure sessionmanager
ensure fivem
ensure hardcap
ensure rconlog
ensure scoreboard

sv_scriptHookAllowed 0

# Uncomment this and set a password to enable RCON. Make sure to change the password - it should look like rcon_password "YOURPASSWORD”
#rcon_password "”

sets tags "default”
sv_hostname "FXServer, but unconfigured”

# Nested configs!
#exec server_internal.cfg

# Loading a server icon (96×96 PNG file)
#load_server_icon myLogo.png

# convars which can be used in scripts
set temp_convar "hey world!”

# Uncomment this line if you do not want your server to be listed in the server browser.
# Do not edit it if you *do* want your server listed.
#sv_master1 "”

# Add system admins
add_ace group.admin command allow # allow all commands
add_ace group.admin command.quit deny # but don’t allow quit
add_principal identifier.steam:110000100000000 group.admin # add the admin to the group

# Hide player endpoints in external log output.
sv_endpointprivacy true

# Server player slot limit (must be between 1 and 32, unless using OneSync)
sv_maxclients 32

# License key for your server (https://keymaster.fivem.net)
sv_licenseKey cfxk_19SW0G7p6VWHreD85OGcf_3pAtHV
Save and close the file when you are finished.
Note: You will need to register and add your server at https://keymaster.fivem.net to get a license key.
Step 4 – Start FiveM Server
At this point, your FiveM server is installed and configured. Now, it’s time to start the FiveM server using the mod installer. You can start it with the following command.
cd ~/fivem-resources && bash ~/fivem-server/run.sh +exec server.cfg
When your FiveM server is started successfully, you will get the following output.
0/315Server license key authentication succeeded. Welcome!
Authenticating with Nucleus...
[#####-------------------------------------------------------------------------------------------------
-------------------------------] 11/315 fff
cccc ff xx xx rr rr eee
cc ffff xx rrr r ee e
cc ff xx ... rr eeeee
ccccc ff xx xx ... rr eeeee

Authenticated with cfx.re Nucleus: https://hitj-e8q3pd.users.cfx.re/
[###############################-----------------------------------------------------------------------------
-------------------------] 74/315-- [server notice: tebex_not_set]
================
Monetize your server using Tebex! Visit https://tebex.io/fivem for more info.
================
Press the CTRL+C key to stop the server. We will create a systemd file to start the FiveM server at system reboot.
Step 5 – Create a Service File to Start FiveM At System Boot
It is a good idea to create a systemd service file to manage the FiveM service via systemctl command. You can create a systemd service file using the following command.
nano /lib/systemd/system/fivem.service
Add the following configurations:
[Unit]
Description=FiveM server

[Service]
Type=forking
User=root
ExecStart=/usr/bin/fivem_start.sh

[Install]
WantedBy=multi-user.target
Save and close the file then create a FiveM start script:
nano /usr/bin/fivem_start.sh
Add the following configurations:
#!/bin/bash
screen -dm bash -c 'cd /root/fivem-resources && bash /root/fivem-server/run.sh +exec
server.cfg'
Save the file then set the execution permission on startup file.
chmod +x /usr/bin/fivem-start.sh
Next, reload the systemd daemon to apply the changes.
systemctl daemon-reload
Next, start FiveM server and enable it to start at system reboot:
systemctl start fivem
systemctl enable fivem
To verify the FiveM service status, run the following command.
systemctl status fivem
At this point, FiveM server is started and listens on port 30120.
How to Install a FiveM Server on Windows
In this section, we will show you how to create a FiveM server on Windows.
Prerequisites
- A system running a Windows server or Windows 10 operating system.
- An administrative password is configured.
How to Make a FiveM Server on Windows
Follow the steps below to create a FiveM server on Windows using the ESX framework.
Step 1. First, create a new folder at C:\FXServer\server.
Step 2. Next, download the latest FiveM server build for Windows from the artifacts server.
Step 3. Next, download cfx-server-data in a new folder outside of your server binaries folder, for example, C:\FXServer\server-data.
Step 4. Next, generate a Steam API key and license key for FiveM at https://keymaster.fivem.net.
Step 5. Next, create a server.cfg file in your server-data folder and add the following configuration including your license key.
endpoint_add_tcp "0.0.0.0:30120”
endpoint_add_udp "0.0.0.0:30120”

ensure mapmanager
ensure chat
ensure spawnmanager
ensure sessionmanager
ensure fivem
ensure hardcap
ensure rconlog
ensure scoreboard

sv_scriptHookAllowed 0

# Uncomment this and set a password to enable RCON. Make sure to change the password - it should look like rcon_password "YOURPASSWORD”
#rcon_password "”

sets tags "default”
sv_hostname "FXServer, but unconfigured”

# Nested configs!
#exec server_internal.cfg

# Loading a server icon (96×96 PNG file)
#load_server_icon myLogo.png

# convars which can be used in scripts
set temp_convar "hey world!”

# Uncomment this line if you do not want your server to be listed in the server browser.
# Do not edit it if you *do* want your server listed.
#sv_master1 "”

# Add system admins
add_ace group.admin command allow # allow all commands
add_ace group.admin command.quit deny # but don’t allow quit
add_principal identifier.steam:110000100000000 group.admin # add the admin to the group

# Hide player endpoints in external log output.
sv_endpointprivacy true

# Server player slot limit (must be between 1 and 32, unless using OneSync)
sv_maxclients 32

# License key for your server (https://keymaster.fivem.net)
sv_licenseKey cfxk_19SW0G7p6VWHreD85OGcf_3pAtHV
Step 6. Next, open your Windows command interface and run the following commands to start the FiveM server.
cd /d C:\FXServer\server-data
C:\FXServer\server\FXServer.exe +exec server.cfg
You can now download the FiveM client, install it on your machine, connect to your FiveM server, and start inviting your friends to play together.
Conclusion: How to Set Up a Fivem Server
In this post, we explained how to make a FiveM server on Windows and Linux machines. I hope you can now easily make your own Fivem server for free.
FAQs: How to Make a FiveM Server for Free
1. How to Update FiveM Server Artifacts
To update your FiveM server artifact, follow the below steps:
- Stop the FiveM Server.
- Delete existing files in FXServer.
- Download the latest artifact and extract it to your FXServer folder.
- Restart the FiveM Server.
2. How to Clear FiveM Server Cache
To clear the FiveM server cache:
- Open the server data folder.
- Then, open the Cache folder and delete the files folder.
3. Can’t Connect to FiveM Server
To resolve the FiveM server connection problem, follow the below steps.
- Make sure the FiveM server is running.
- Allow FiveM port via Firewall.
- Stop any antivirus program on your computer.
- Clear cache.
- Remove the crash dump folder from the FiveM folder.
4. FiveM Crashing When Joining Server
Here are the troubleshooting steps to fix the error.
- Incompatible audio device:- Some audio devices are likely incompatible with this game. So, you will need to disable all unused audio devices.
- Cache files:- Delete all the files inside the cache folder, except the game folder.
- Outdated BIOS:- Your system BIOS missing some updates that are crucial for the game to work. In order to fix this, you need to download and install the available updates for your specific motherboard.
- Reinstall GPU drivers:- Uninstall the GPI drivers that they are currently using, then install the latest updates available.